• About
  • La Micaela Farm Shop

fincafood

~ culinary and horticultural life on a Spanish farm

Category Archives: Main Courses

Thai Green Curry with Seafood & Oriental Salad

26 Monday Aug 2013

Posted by Nevenka in Fish, Food for One, Main Courses, Sauces, Vegetable Dishes

≈ Leave a comment

Tags

Oriental Salad, Salad, Seafood, Thai Green Curry

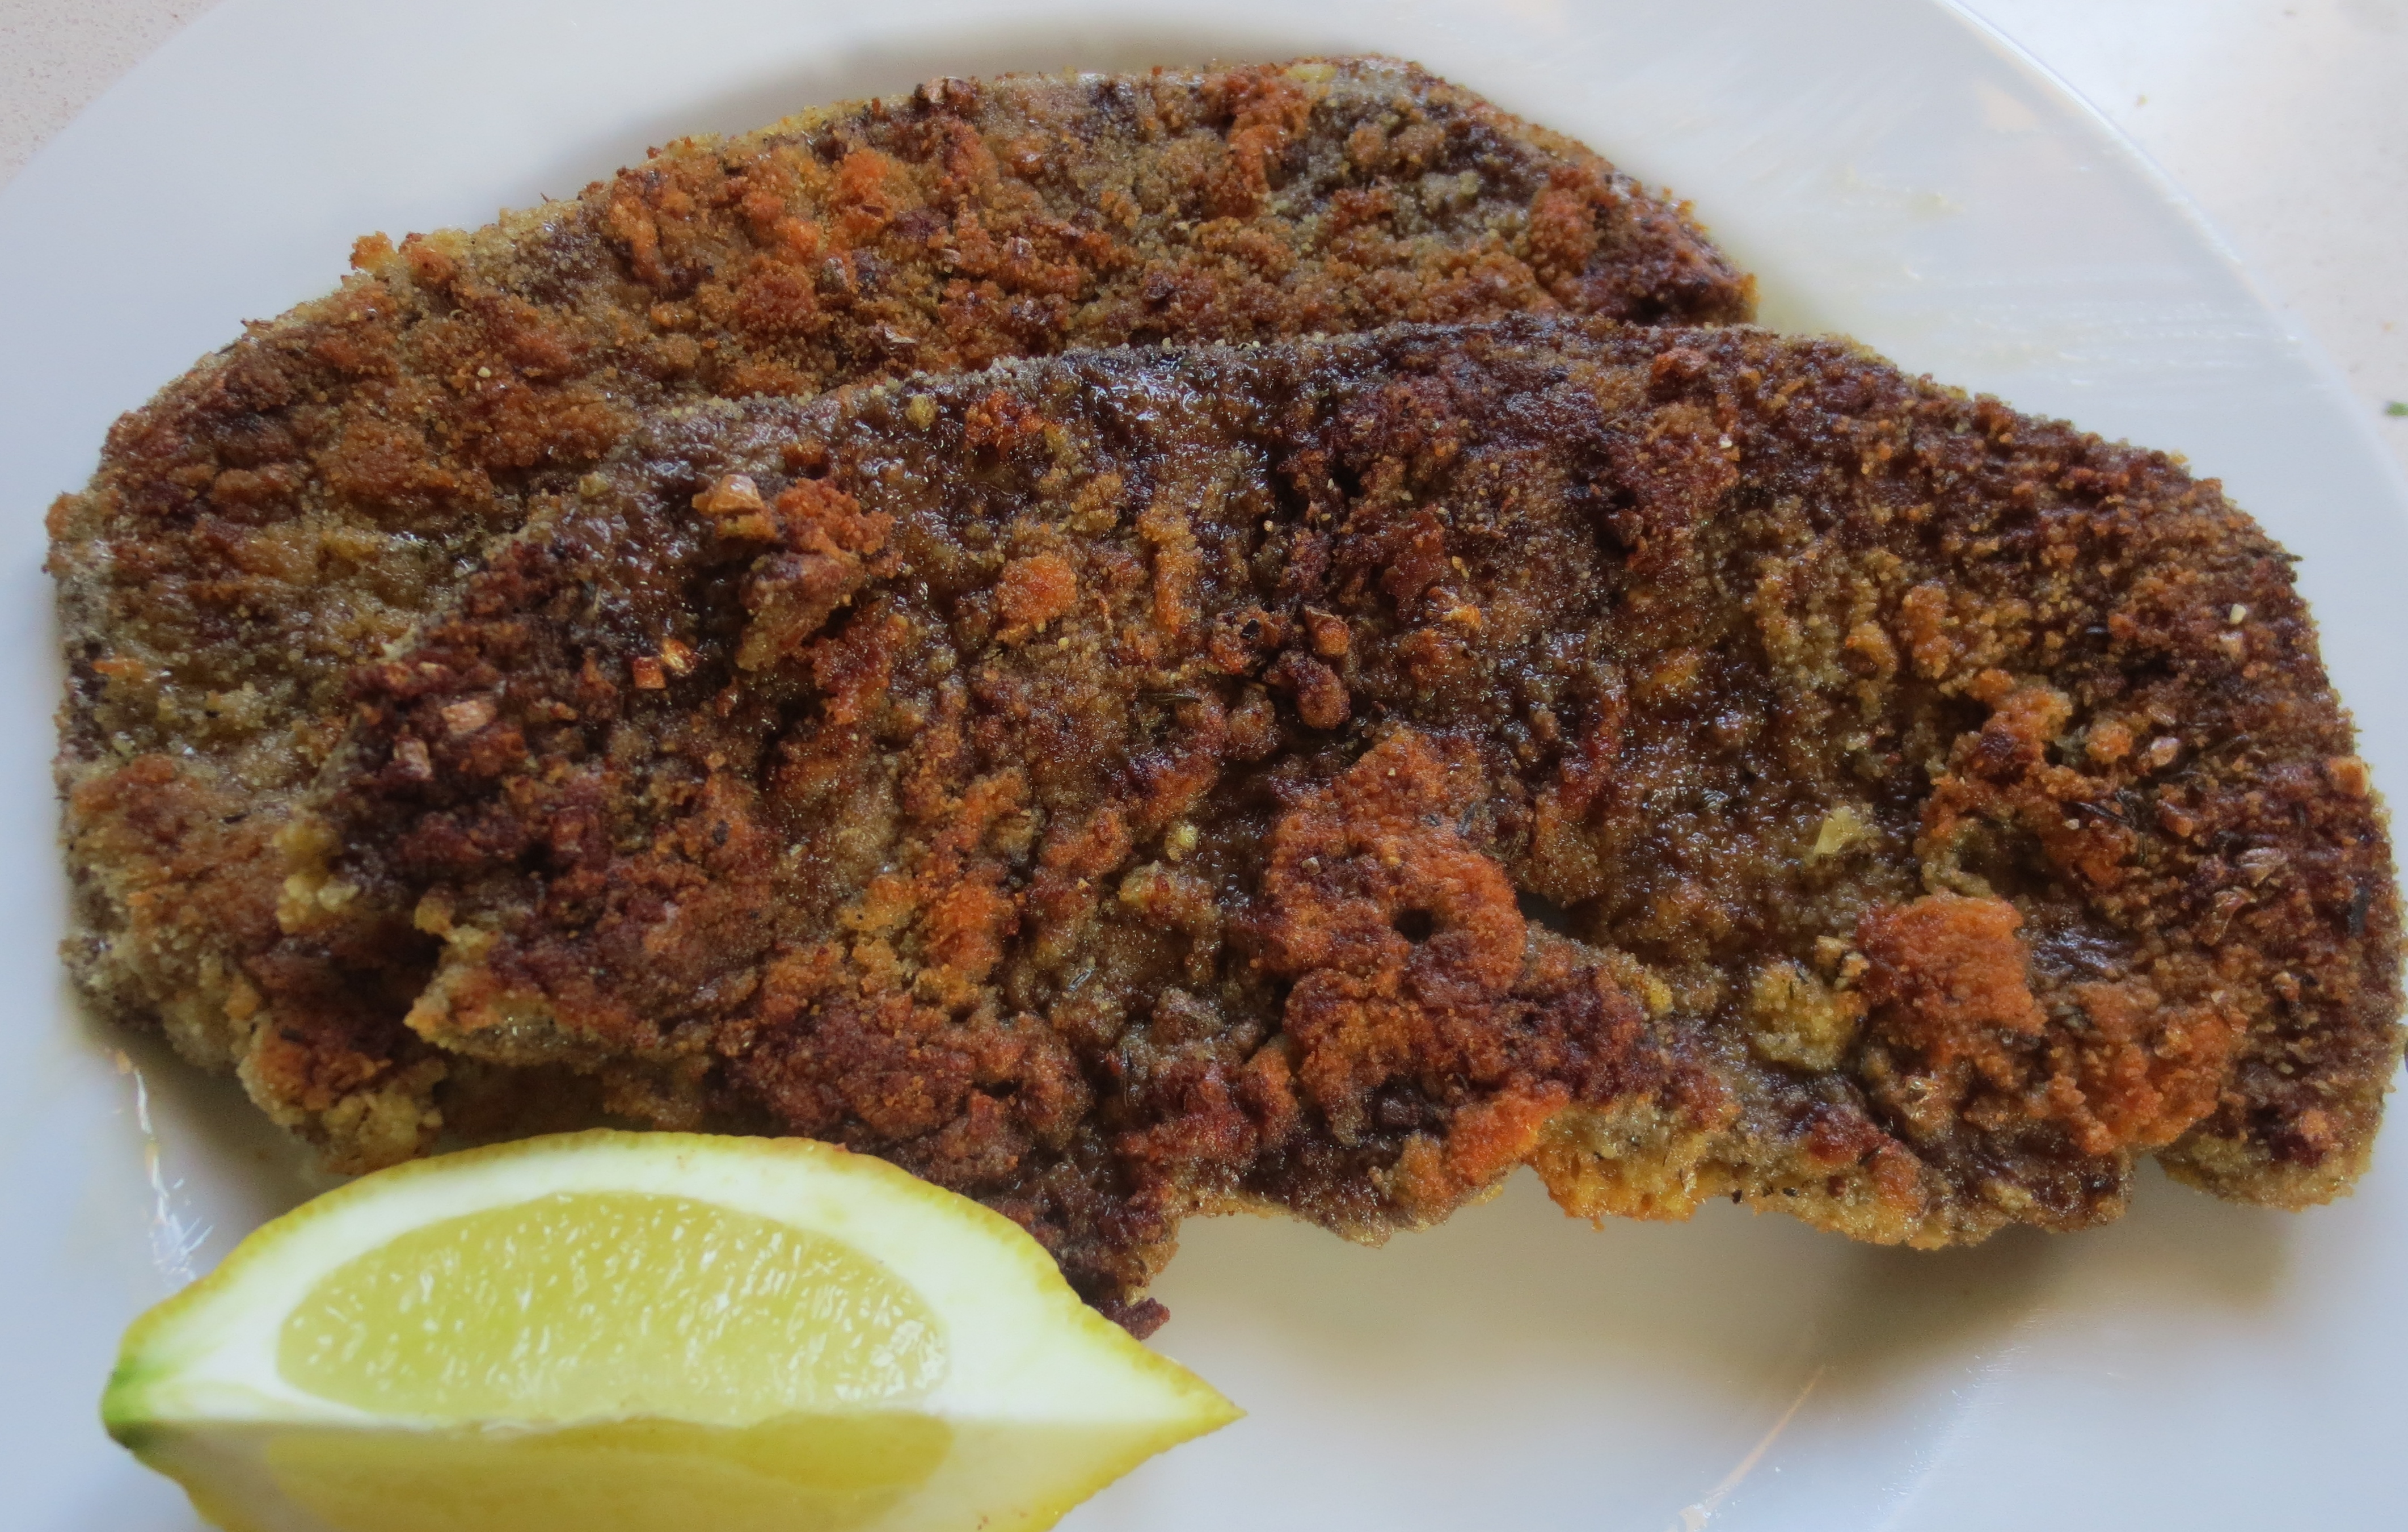
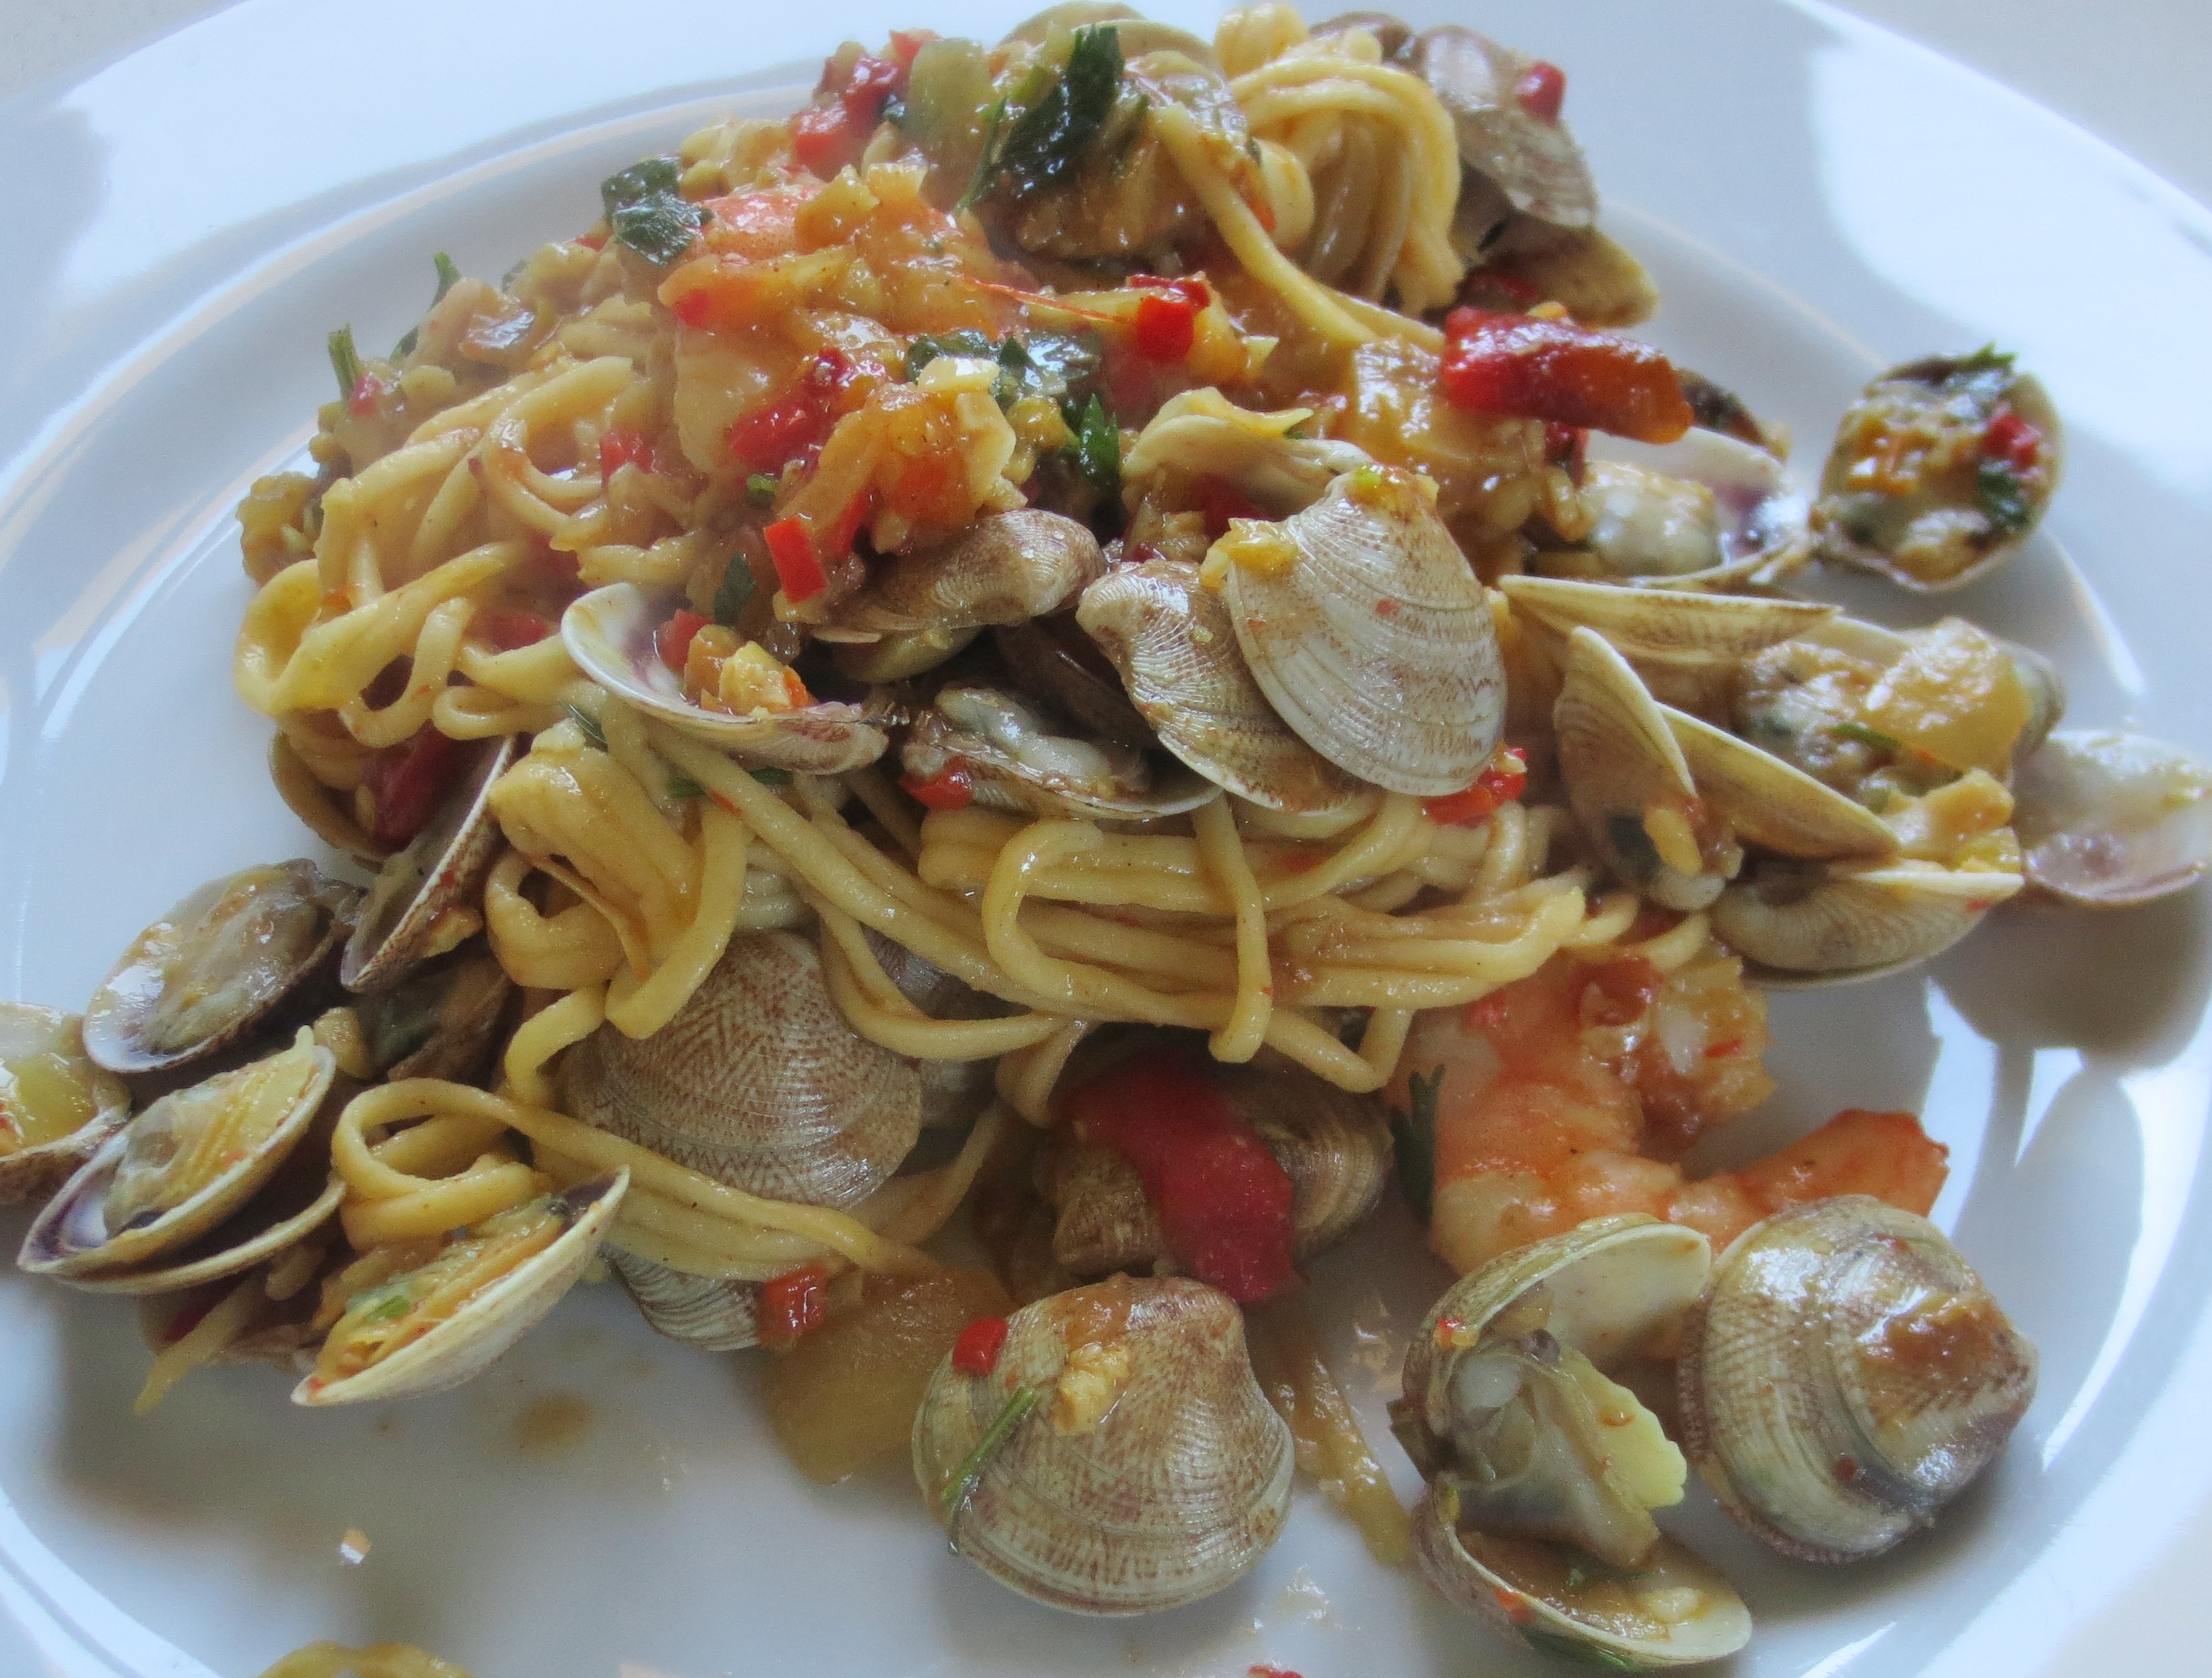
THAI GREEN CURRY WITH SEAFOOD

I fell in love with Thai cooking on a visit there many years ago, and took copious notes of everything that I ate. Once home I set about recreating the dishes that I had enjoyed while there. I started by buying in the curry pastes, but now that I grow all the essential ingredients on the farm, I make my own, and I am not sure that I could now go back to the bought ones. The difference is the freshness of the taste, that if you do not over process you can have texture to the paste, and also of course that you can balance the proportions of the ingredients depending on how spicy you require it to be.

For a seafood curry, I like spice, but not overpoweringly so, but I still want a good strong flavour of ginger, garlic and lemon grass, so I put with them a milder pale green chilli which still has spice together with a good pepper flavour.

????????????????????????

For the paste – enough for a curry for 4

4 cloves garlic

2 stalks of lemon grass

A piece of ginger, or galangal if you can get it, roughly 5 cm x 2 cm

2 tablespoons Nam Pla – Thai fish sauce

Roughly chop the garlic and pound to a pulp in a mortar.

Take the outer leaves off the lemon grass and cut off the tough base. Finely slice the tender part at the base, usually you get about 2 cm of tender part.

Add to the garlic.

Scrape the skin off the ginger and grate into the mortar with the garlic and lemon grass. Mash with the pestle until a paste adding the fish sauce as you go along.

This paste can be made in advance and be left developing its flavours in the fridge until needed.
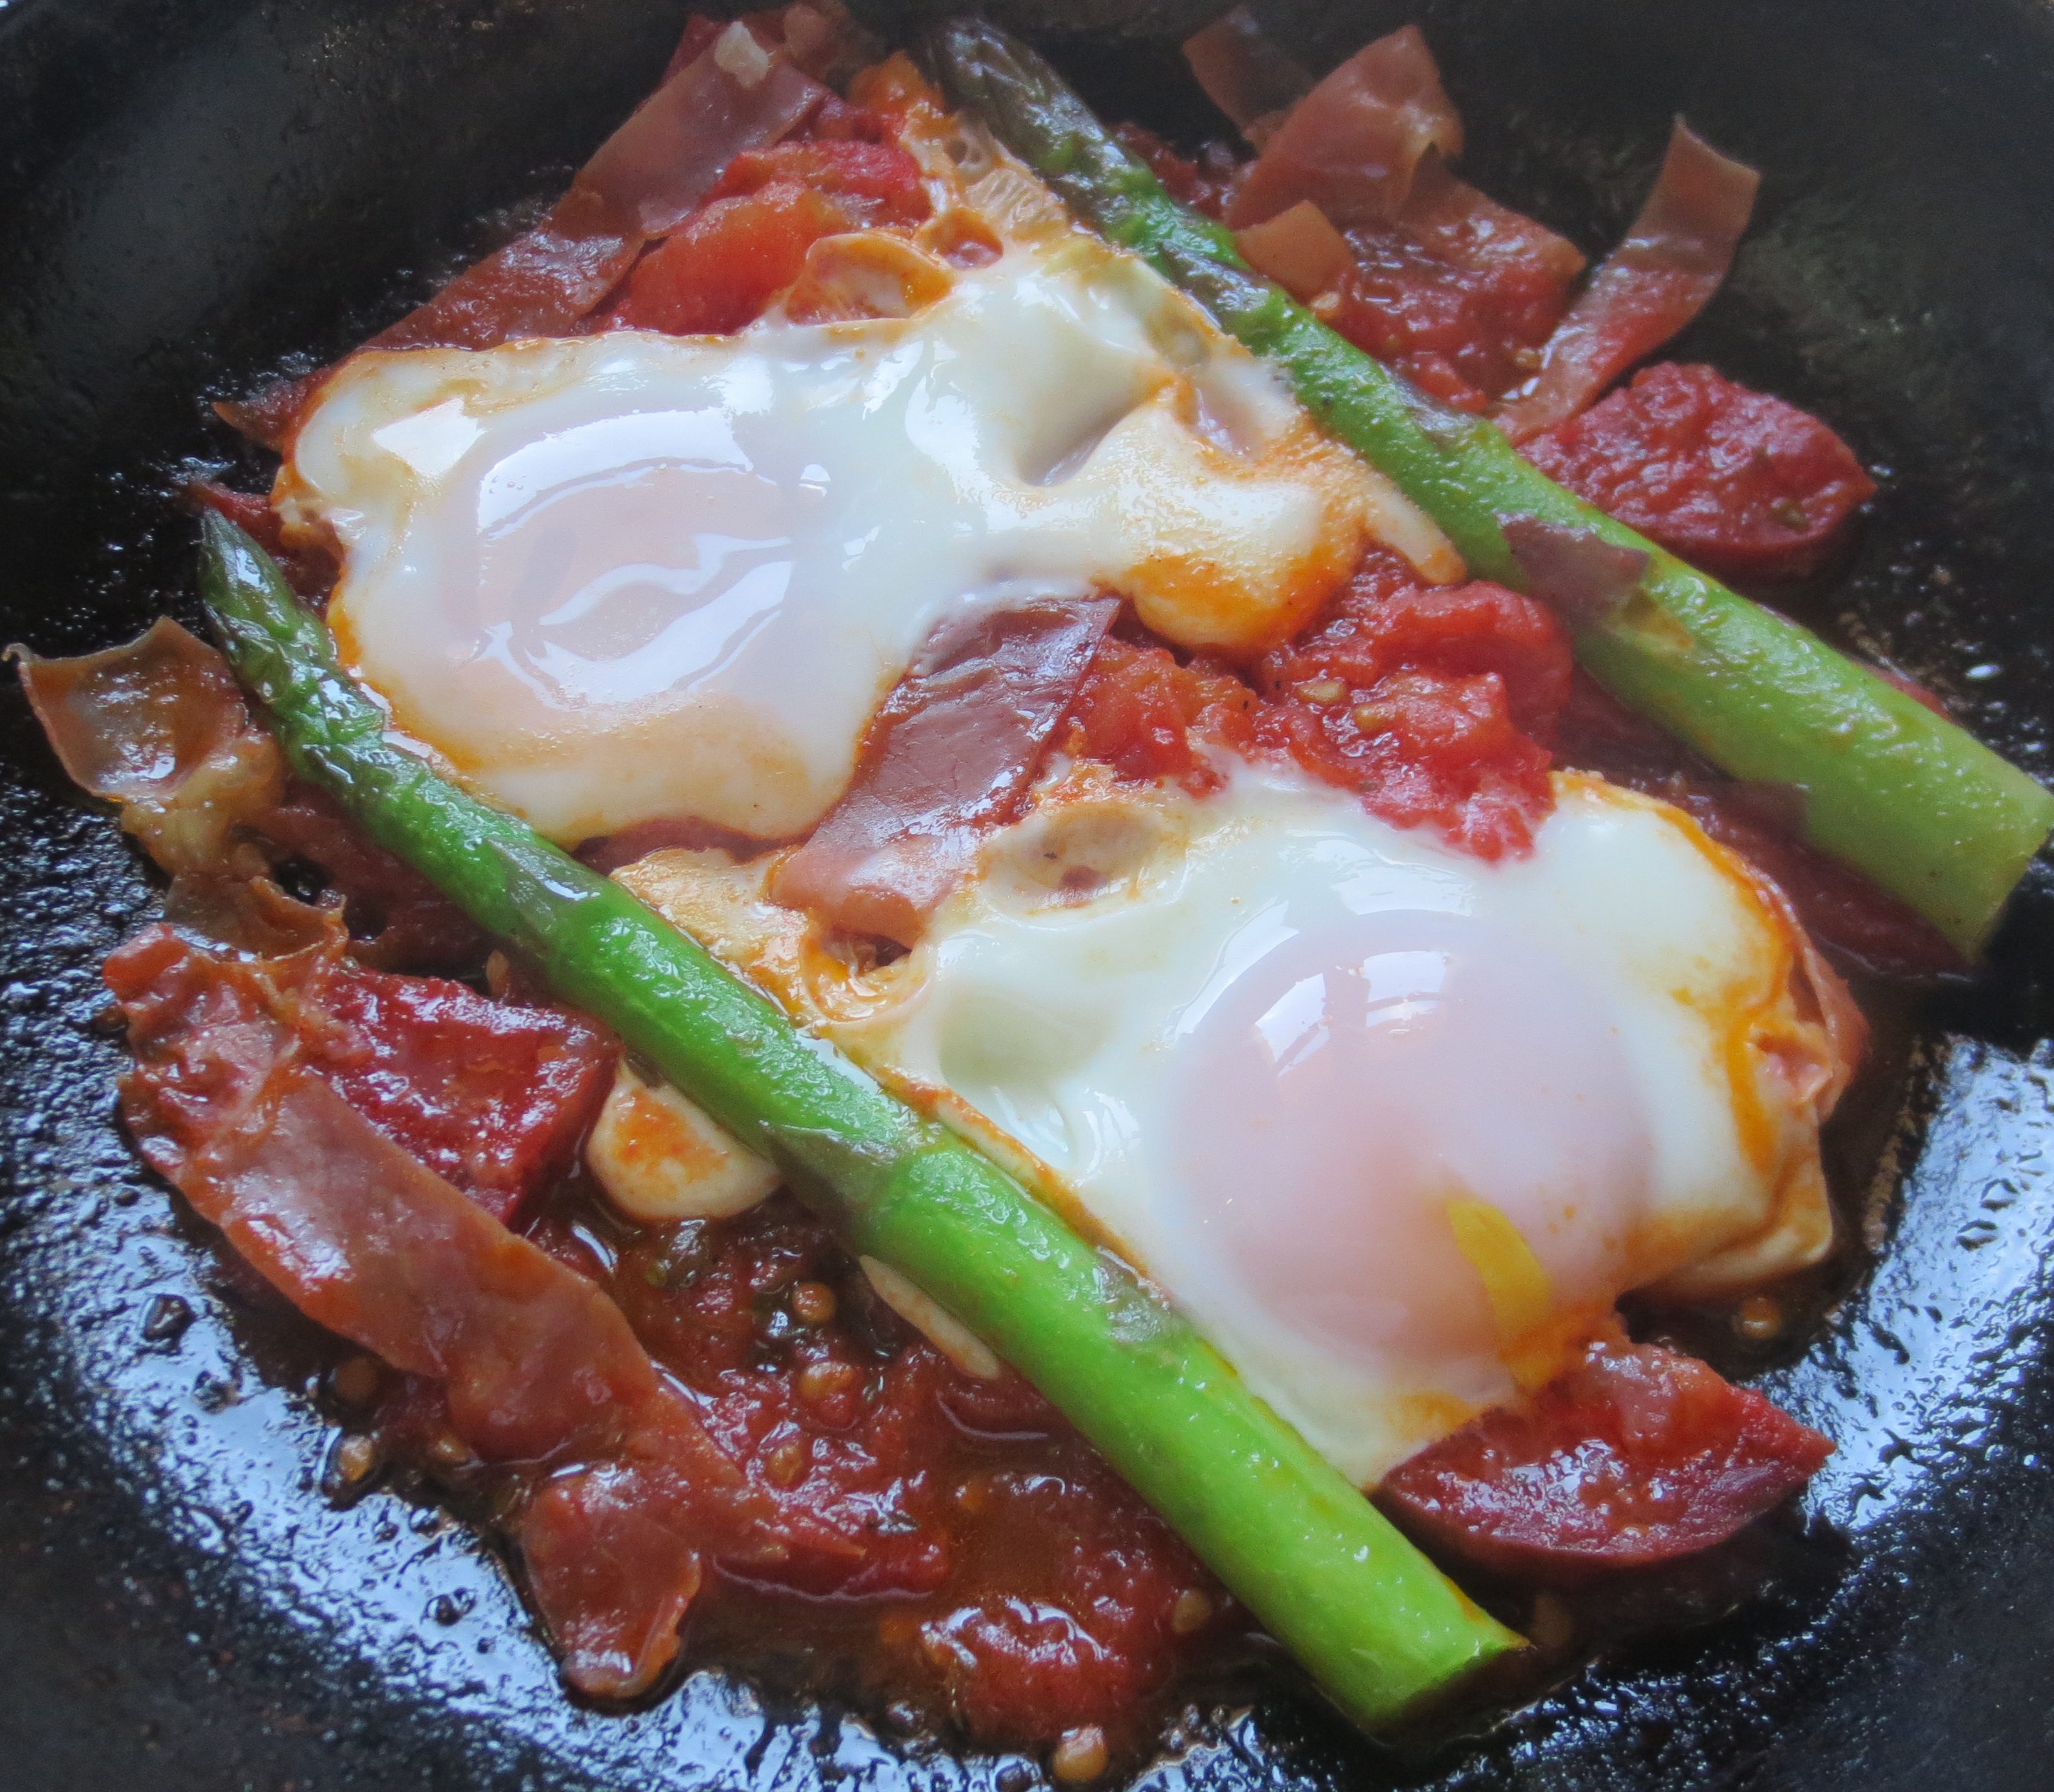
For the fish –

Large peeled prawns

Mussels

White meaty fish like swordfish, shark, monkfish, cod, haddock

1 tablespoon each of red and black fish eggs

A large sweet onion or 5-6 spring onions

Large can of coconut milk

Good bunch of basil leaves or Thai parsley

Olive oil for frying

Peel and slice the onion. In a pan big enough to take the curry, soften the onions in oil.

Add the curry paste and fry for a few minutes.

Add the coconut milk and stir well to mix in. Bring to a simmer and start adding the fish.

Keep the curry on a low heat while the fish cooks to ensure that it doesn’t overcook.

The white fish wants to be cut into chunks. If you think that all the fish requires the same amount of cooking, you can add it all in one go.

The fish shouldn’t need more than five minutes to cook.

Lastly add the fish eggs. I had assumed before putting these in hot dishes that they would melt into the sauce, but they don’t and so add colour and texture to fish dishes. They look particularly effective on Salmon with pasta.

Garnish with the chopped herbs and serve with plain boiled rice.

ORIENTAL SALAD

This is adapted from a recipe in Sri Owens fabulous book of Indonesian recipes. I would not call this a fixed recipe as I use whatever is fresh in the vegetable garden. If I plan ahead enough, I get some beansprouts sprouting a few days in advance. They are not available to buy fresh here in Spain, so you have to grow your own. If you cannot get fresh ones, miss them out rather than use the cooked ones that come in jars, the flavour and texture are just not the same.??????????????????????????????????

A selection of the following –

Fresh bean sprouts

French or Yard Long beans – blanched by pouring boiling water over them, leaving them a minute, and then draining and leaving to cool

Chinese leaves or other greens – finely shredded

The following all cut into fine julienne –

Radishes

Carrots

Small tender courgettes

Green peppers

Red peppers

Plus –

Basil leaves – Thai is best, but the usual or Lettuce Basil will do – shredded

Fresh mint leaves

For the dressing – these amounts are for a salad for 4

100 gms roasted peanuts

1-2 cloves of garlic – finely chopped

1teaspoon crumbled shrimp paste or 1 tablespoon Thai fish sauce

Red chilli – to taste – it wants to be quite spicy – finely chopped

1teaspoon soft brown sugar

Juice of a lime

Salt to taste

Put all the prepared vegetables in a dish with the herbs and mix together.

Prepare the dressing. In a mortar pound all the ingredients except the lime juice until a rough paste with the nuts still having some bigger bits for texture. Add the lime juice and mix. Add just enough water to make into a sauce.

Pour over the salad and mix well. Serve at room temperature.

Share this:

  • Share on X (Opens in new window) X
  • Share on Facebook (Opens in new window) Facebook
  • Share on WhatsApp (Opens in new window) WhatsApp
  • Email a link to a friend (Opens in new window) Email
Like Loading...

Tarte Flambee, Langos & Provencale Onion Tart

10 Wednesday Jul 2013

Posted by Nevenka in Main Courses, Snacks and Tapas

≈ Leave a comment

Tags

fire bricks, flat breads, Langos, Tarte Flambee

While I am on the theme of flat breads with toppings, I thought I would share with you a small selection from around the world.

I came across a mention of Tarte Flambee in an article recently where the recipe instructed you to buy a ready made pizza base on which to place the toppings. This misses the whole essence of the dish, which is fineness. The bread base wants to be rolled as thinly as you can into a rectangle. When I was cooking this regularly in a restaurant I would use day old dough that was less springy than fresh and consequently easier to roll thinly.

A standard bread dough as in the previous post is used for the base. As I have said roll it thinly into a rectangle to fit either a silicon or metal baking sheet.

????????????The classic topping is a smearing of thick cream, then onion that has previously been sliced thinly and softened in butter and small lardons of smoked streaky bacon.

Preheat the oven to 250 C with the floor lined in fire bricks as in the previous post.

Place the tart on its sheet onto the bricks to bake.

As the dough is thin it will only take five or six minutes for it to be cooked and crisp.

Variations to go on top of the cream –

Sliced mushrooms softened in butter – even better if thy are wild mushrooms – with or without the bacon.

Shredded spinach softened in butter.

Asparagus, either white or green or both.

The onions with thin slices of sauccison sec, or strips of cooked ham, or strips of mortadella.

The Provencale Onion Tart takes the same idea to the south of France and makes it more robust.

Line an oiled shallow tart tin with bread dough rolled to about half a centimetre thick or a bit thicker.

Peel and slice 3 or 4 large onions thinly. Soften in olive oil and continue cooking slowly until the onions are much reduced and starting to caramelise.

Distribute the onions evenly over the base of the tart, drizzle over some cream and decorate with a scattering of black olives.

Bake at 230 C on the bricks for 10 to 15 minutes.

To test if it is done, lift up the tart with a palette knife and check that the dough is cooked to a light brown firmness underneath.

Langos – pronounce the s as sh – hails from Hungary. I was visiting there with some friends, and the family of Zsuzsi prepared this and baked it in the most amazing ancient bread oven in the little house on their allotment.

IMG_0312The toppings for this are put on after the bread is baked. They are laid out on the table in little dishes for each person to serve themselves. There was –

A bowl of sour soft fresh cheese.

Tiny cubes of streaky bacon, fried until quite dry and crisp.

Both sweet and spicy smoked Paprika.

A bowl each of chopped dill, parsley and chives.

The dough for this is made with the addition of mashed potatoes, which makes a very soft and fluffy bread.

Use the bread recipe in the previous post adding 150 grams mashed potato and cutting the water down to 200 ml. If the dough seems too dry at that, then add a little more water. It is impossible to be more precise as potatoes vary so much in their water content.

When the dough is ready, form into individual sized breads about 10 cm across and about a centimetre thick. Put them on a floured tray in a warm draft free place to prove for half an hour.

Heat the oven to 230 C with the fire bricks in. Bake the Langos on the bricks for about ten minutes or until a lighbar brown in colour.

Serve while still warm with the toppings as described.

Other recipes to search out for yourselves are Turkish Pide and Cocas from the Balearic Islands.

Share this:

  • Share on X (Opens in new window) X
  • Share on Facebook (Opens in new window) Facebook
  • Share on WhatsApp (Opens in new window) WhatsApp
  • Email a link to a friend (Opens in new window) Email
Like Loading...

Making your own Perfect Pizza

09 Tuesday Jul 2013

Posted by Nevenka in Main Courses, Starters

≈ 1 Comment

Tags

Mozarella, Pecorino, Pizza

I am very fortunate to have in my kitchen in the farmhouse a fabulous wood burning oven, so for me to make good pizzas at home is not so difficult.IMG_1701

I am well aware that the average kitchen is not so equipped, so I have been experimenting with a standard fan oven to see how to achieve the desired crispy pizza. The key to success involves a trip to your builders suppliers to buy some refractory or fire bricks. These are the bricks that are used to line fire places and traditional ovens. You will not need many, just enough to line a shelf of your oven. Even though I have the wood burning oven, lining the floor with fire bricks has improved hugely the quality of pizzas and breads that I bake.

It is possible to buy online bread stones which will do a similar job, but without buying several and trying them out I cannot vouch for their effectiveness. Having said that, the pros and cons seem to me to be that;  the fire bricks are usually 3 cm thick, which will hold the heat better than something thinner, and so cook the pizza quicker and give a crisper result, but to get the bricks to fit your oven you might have to trim some of them. The fire stones come in a neat size and shape, but are generally thinner, so may not give you such a crisp pizza.

The fire bricks or pizza stones act in a similar way to the thick base of pans – they hold and evenly distribute the heat. When you put your pizza or loaf on the hot bricks, there will be enough heat already in them to start cooking it straight away, and hence you get a crisper result.
The bricks or baking stone need to be put into a cold oven and then heated up, and when you have finished baking leave them in the oven to cool down slowly.
If they cool too rapidly they are likely to crack. In a fan assisted oven heat it to 250 C which is the maximum in mine. At his temperature the pizzas will only take about 7 minutes to cook, so bear this in mind and either remind yourself with a timer, or don’t wander off. This is important when you have guests who can distract you. You can tell that I am speaking from experience here.
The other key to creating an authentic style crisp pizza is to go light on the toppings especially the wet ingredients. Remember the toppings are there to flavour the bread rather than the bread being a raft for lots of heavy cheese and salami. Also getting the pizza onto the bricks is not so easy and when it is heavy with toppings it is much more likely to break.
For novices I can recommend using one of those silicon sheets. Lay the pizza base on the sheet, add toppings and then put the whole thing on the bricks.
For the pizza base, I use a standard white bread dough –
500 gms strong white bread flour
15 gms fresh yeast or 7 gms dried
300 ml tepid water
1 tablespoon / 15 ml olive oil
1 tablespoon / 15 ml sea salt
I make my dough in a bread machine – simply put all the ingredients in the machine, the order is not important, put it onto the dough programme, and leave it to it.
If you don’t have one then making it by hand is not complicated.
Sieve the flour into a bowl or onto a board and make a well in the centre.
Measure the water in a jug and add to it the salt, yeast and oil. Stir to mix.
Pour the water mix into the well in the flour and bit by bit mix with the flour.
If you have a dough hook attachment for you mixer you can use this.
Turn the dough onto a floured board if it is not already on one, and knead to mix well for about five minutes.
Put into a bowl that will leave room for growth, cover with cling film, put in a warm draft free place for about an hour or until it has doubled in size.
The dough made in the machine and the hand made are snow at the same stage.
Turn the dough onto a floured board and knead for a couple of minutes. It will lose some of its volume, but don’t worry.
It is now ready to be rolled into pizzas. The size is up to you. If you are feeling up to it you can have go at the twirlIng method used by the professionals. I am rubbish at it, so can offer no advice, I use a rolling pin pastry style and plenty of flour on the work surface to stop it sticking.
 IMG_0232
So to toppings.This is where creativity and imagination can be used, although the choices are much more often down to what is in the store cupboard or in season.
The simplest is to brush the rolled dough with olive oil and then sprinkle with salt.
Add chopped or crushed garlic and you have the best ever garlic bread.
The oil with fresh herbs especially rocket, rosemary or basil. Try the herbs with grated lemon zest to add extra zing.
The topping above is yellow and red peppers stewed in olive oil with garlic and chorizo.
I make Passata in the summer from tomatoes, garlic and courgettes and this is perfect base on pizzas for either seafood, or the Neopolitan mix of black olives, capers, chilli and chopped garlic.
Now we start with the cheese. I love Globe Artichokes sliced thinly and stewed in oil, put onto the pizza base and strewn with grated salty Parmesan.
IMG_0228
A new favourite since the visit to Naples is smoked mozerella and chilli. Here with Parma ham and mushrooms.

IMG_0235 A smearing of tomato, then thin shavings of Pecorino, and fresh Asparagus.

The options are endless and yours to choose. Have fun with them.

Share this:

  • Share on X (Opens in new window) X
  • Share on Facebook (Opens in new window) Facebook
  • Share on WhatsApp (Opens in new window) WhatsApp
  • Email a link to a friend (Opens in new window) Email
Like Loading...

Neopolitan Pizzas

05 Wednesday Jun 2013

Posted by Nevenka in Main Courses, Starters

≈ Leave a comment

Tags

Mozzarella, Naples, Pizza, Provole

IMG_0199Are there any others you may ask? Naples being the home of the pizza, on a recent visit I just had to search out a restaurant preparing the authentic item. With the help of http://www.napoliunplugged.com I found the perfect place right in the centre of the city. Restaurante Sorbillo is not much more than a cafe with a wood burning oven.

IMG_0197They don’t even bother with salad, they just make pizzas very very well. There were five girls in our party, so we started off thinking that three pizzas between us would be plenty, but the combinations of toppings on offer made it impossible to whittle down to so few, so five it was –IMG_0200We had a cheeseless one topped with tomato sauce, capers, anchovies, olives and fresh chopped chillies.

IMG_0205Then the classical Quatro Stagioni – spring being represented by thinly sliced courgettes and fresh basil leaves atop a creamy mozzarella base. Summer was a smearing of tomato sauce and oregano, mozzarella again and salami. Autumn of course was represented by mushrooms and winter was smoked Provole cheese and with with a tomato sauce.

IMG_0201There was four cheeses with ham and basil leaves and no tomato.

We were so busy eating that I didn’t get photos of the final two pizzas to arrive at our table which were a classical Marguerita, tomato, oregano, mozerella and ham, and our favourite pizza which featured  smoked Provole again, there was a base of tomato sauce and fresh chopped chillies, and on top of the cheese cherry tomatoes and ham. In the next post I will show you how to create these pizzas in your own kitchen.

i leave you with some shots of Naples.IMG_02142013-04-04 16.14.00

Share this:

  • Share on X (Opens in new window) X
  • Share on Facebook (Opens in new window) Facebook
  • Share on WhatsApp (Opens in new window) WhatsApp
  • Email a link to a friend (Opens in new window) Email
Like Loading...

Love Liver

30 Saturday Mar 2013

Posted by Nevenka in Food for One, Main Courses

≈ Leave a comment

Tags

Liver, Liver Breadcrumbed with Garlic and Rosemary, Tomato Pilav

Quite a lot of people think that they don’t like liver. And if their only experience of it is the stewed beef liver that was served  at school, then I can fully understand them having a prejudice against it. But please give liver another chance. Think more those gorgeous liver pates and less the shoe leather of the aforementioned school dinners.

Veal liver is the most tender and has a gentle flavour and smooth texture. In France it is frighteningly expensive (24€ a kilo last time I was there) it is so highly prized. Buy it cut into thin slices so that it cooks quickly. It is ideal for the Liver in Breadcrumbs below.

Pork liver not only has a very good texture and the sweetest flavour of all the livers, it is also very economically priced. Despite the Liver with Tomato Pilav being a dish from Turkey, which is Muslim, we always used pigs liver to make it. The Liver in Breadcrumbs recipe also suits pigs liver very well.

There are some golden rules to cooking liver successfully.

Firstly never cover it, the steam makes the liver go tough and rubbery. Secondly never cook the liver in a sauce or any other liquid as this has the same effect as the steam. You can fry the liver, but then remove it from the pan to a warm plate while you use the juices in the pan to make a sauce. The liver can then be returned to the pan to be heated through in the sauce, but no more than that. If you have heated it through and find that you are not ready to serve for whatever reason, then turn off the heat and rewarm when you are ready and don’t cover it. One of the reasons that school dinner liver was so leathery was that it was kept warm for extended periods in gravy with a lid on.

The third golden rule is not to overcook the liver. It wants to still be pink in the centre when cut into. If you are unpractised at knowing when it is enough cooked, just take a piece out of the pan when you think that you may be about there and cut into it, it should be pink in the middle, but not red and bloody.

Often when the liver has been taken out of the pan while you make a sauce or in this case finish the Pilav, juices will flow from the liver, this doesn’t mean that it is not cooked enough.

FRIED LIVER PIECES WITH TOMATO PILAV

Throughout our teenage years either my sister Trisha or I cooked this dish for the whole family almost every Saturday lunchtime. It was taught to us by our father who is from Sarajevo the capital of Bosnia. This area was for over five hundred years part of the Ottoman empire, and it was not until we were holidaying in Turkey on a Gulet together with some friends and had this dish served to us that we realised that it is a Turkish dish. Our cook on the boat – Hali – made it for all of us one lunch time, and our friends loving it wondered how it was made, to which Trisha and I announced in unison that we could make it with our eyes closed!IMG_0119

For 4 people

1 large or two medium onions – finely chopped

1 red pepper – cut into strips – optional

500 grams liver cut into bite sized pieces

Salt and freshly ground black pepper

Olive oil for frying

200 grams long grain rice

250 grams peeled plum tomatoes – either freshly peeled or tinned

Fresh flat leaved parsley – roughly chopped

Firstly put the rice on to boil. Use your usual method but you want the rice slightly under cooked.

Heat the oil in a large frying pan and add the onions and peppers if you are using them. Fry over a moderate heat until the onions are lightly browned.

Season the liver pieces with salt and a generous amount of freshly ground black pepper. Add to the pan with the onions and cook stirring from time to time until the liver is just cooked. This will take about ten minutes. Do not cover. If the pan is covered the liver will steam and go tough.

To see if the liver is cooked enough, take out a piece and cut into it. It should be pink inside. If it is red inside it is not cooked enough and if it is brown you have gone too far.

Not cooked enough

Not cooked enough

Just right

Just right

Remove the liver from the pan leaving behind the onions, pepper if used and the juices. Add the tomatoes to the remains of the pan and stir to mix. Cook over a higher heat until the tomatoes have deepened in colour and cooked.

Drain the rice and add to the tomatoes. Stir well to mix together and cook for a couple of minutes for the flavour of the tomatoes to penetrate the rice.

Add the liver and mix again. Cook a minute or two for the liver to rewarm. Stir in the parsley. Serve with a green salad.

LIVER SLICES BREADCRUMBED WITH GARLIC AND ROSEMARYIMG_0115

This is a very simple dish and was very popular when I put in on the menu in restaurants where I worked.

Either veal or pigs liver cut into thin escalope style slices

Beaten egg

Breadcrumbs

Garlic, finely chopped

Fresh rosemary, finely chopped

Salt and freshly ground black pepper

Olive oil or duck or bacon fat for frying

Put the breadcrumbs in a shallow dish and season with the garlic, rosemary, salt and pepper. Be generous with the garlic and herbs as coatings are a little like marinades in that the flavours tend to disappear in the cooking.

Heat the fat or oil in a pan large enough to take all the liver slices.

Dip the slices in the beaten egg to coat them and then into the breadcrumbs likewise to coat them, making sure that you have and even coating of breadcrumbs all over the slice.

Fry on a medium heat until crisp and golden on each side.

Serve with a wedge of lemon to squeeze over.

Share this:

  • Share on X (Opens in new window) X
  • Share on Facebook (Opens in new window) Facebook
  • Share on WhatsApp (Opens in new window) WhatsApp
  • Email a link to a friend (Opens in new window) Email
Like Loading...

Eggs Baked with Tomato, Ham, Asparagus & Chorizo

27 Wednesday Mar 2013

Posted by Nevenka in Food for One, Main Courses

≈ Leave a comment

Tags

Asparagus, Corizo, Eggs, Ham, Huevos a la Flamenca

Some of the most memorable dishes that I have tasted in Spain have been found in unprepossessing little restaurants in small villages while touring around the country. In Alicante province, crisply roasted tender artichokes seasoned with garlic. In Murcia province, freshly boiled ham cut into thick slices and dressed with freshly ground black pepper, lemon juice and generous amounts of fruity olive oil, crusty chewy country bread on the side. Near Guadix, a heap of braised tiny wild mushrooms  that were such a taste explosion that I can’t recall the rest of the meal. En route to Cordoba, a delicate cold soup of garlic and creamed almonds.

And north of Seville, this starter of Huevos a La Flamenca. A base of freshly made garlicy tomato sauce, with strips of ham, chorizo, peppers and asparagus into which an egg is broken, then the dish is baked to cook the egg, or the pan can be covered on the stove and the eggs steamed to set them. It is served in individual earthen ware dishes. For those of us not out toiling in the fields all day, this is maybe too substantial a dish for a starter, and I like to serve it as a light lunch or supper dish with a green salad and warm bread for dipping in.IMG_0142

This is a perfect time of the year to be cooking this dish as the asparagus is just starting to come up, but there is not enough of it to make a dish on its own. On this occasion I have added some oyster mushrooms to the dish, just because they were in the fridge.

This looks best cooked and served in individual oven proof dishes, but if you don’t have them, you can cook it in one large dish and then serve it out.

For 4

Olive oil

2 cloves garlic finely chopped

Half a kilo peeled fresh tomatoes, chopped roughly / large tin peeled plum tomatoes / 400 ml passata

4 slices Serrano ham

6 slices chorizo cut in half

8 spears asparagus

4 large eggs or 8 small

Heat a couple of tablespoons of oil in a frying pan and add the garlic. Fry a few minutes until translucent.

Add the chorizo and continue frying until it is lightly browned.

Add the tomatoes and continue cooking on a low heat for ten minutes. If you are using passata then cook for five minutes only.

Blanch the asparagus by putting it in a bowl and pouring boiling water over it. Leave it for one minute and then drain.

Divide the tomato sauce and chorizo pieces between the four oven proof dishes.

Cut each slice of ham into three and lay in the dishes leaving the centre uncovered.

Lay two asparagus spears in each dish.

Break an egg or two into the centre of each dish, and put the dishes to cook in a hot oven, 180 C, for ten minutes or so until the whites of the eggs are just opaque and set. Bear in mind that the eggs will continue to cook in the dish.

Put a paper serviette onto each of your plates and top with the hot dishes of eggs.

Serve with a green salad and hot bread.

Share this:

  • Share on X (Opens in new window) X
  • Share on Facebook (Opens in new window) Facebook
  • Share on WhatsApp (Opens in new window) WhatsApp
  • Email a link to a friend (Opens in new window) Email
Like Loading...

Apicius Inspired Onions, Pork Cutlet & Garlic Mash

19 Tuesday Mar 2013

Posted by Nevenka in Food for One, Main Courses, Vegetable Dishes

≈ Leave a comment

Tags

Apicius, Garlic Mash, Onions

Marcus Gavius Apicius, renown Roman gourmand, to whom the first European cookbook still in existence was dedicated. My friends are well aware of my passion for all things culinary and when they come across interesting or obscure books on the subject are likely to treat me to a copy. This one was a gift from my lovely friend Suzane.

It is considered to be the work of several chefs of the time and so the recipes vary in the detail and style quite a lot, with many of the recipes appearing to be notes to oneself or to other chefs who already know the basics of the recipe. I have a couple of recipe books which are collections of recipes by women in a particular region of Spain, and the style is similar in that they assume for example that everyone knows how to make a basic potato tortilla and so only give you their variation on the recipe.

So although the Apicius cannot be used as a straightforward recipe book, it gives a fascinating insight into the cuisine of rich ancient Rome, and there is enough information in some of the recipes to be inspirational. The use of herbs and flavourings is particularly interesting to me. They used a range of fermented sauces, almost concentrated stocks, one of the favourites being that made from Lovage, a descendant of which is still much used in Germany, Maggi Wurze. The fish version sounds very similar to Nam Pla the Thai fermented fish sauce. For sweetness they went for concentrated sweet wines, such as date wine as well as honey. Sweet and sour, salt and sweet, bitter sweet, the new and trendy Umami, they are all there and often skilfully heightened by the use of fresh herbs.IMG_0102

This onion dish I have made before and served it as a vegetable dish, but with the addition of a little extra water during cooking, it makes a really good sauce come vegetable.

APICIUS INSPIRED ONIONS

Per person

Peel a medium sized onion and cut into slices.

Heat a tablespoon of olive oil in a sauce pan, and add the onions. Cook over a low heat with a lid on to keep in the heat and the moisture. Stirring and turning the onions over from time to time.

When the onions have cooked down and are an even golden colour and translucent, add the seasonings.

A quarter of a teaspoon of Maggi Wurze – which is a lovage essence.

A teaspoon  of good honey.

A teaspoon of red wine or sherry vinegar

a good pinch of fresh thyme.

The same of fresh oregano, chopped finely.

Salt and pepper.

A tablespoon water

Continue cooking until very soft and almost a puree.

Serve as a sauce or vegetable accompaniment to meats and fish.

Garlic mash is a regular favourite and there are several ways of making it.

If you want the mash to still be creamy white but with a hidden punch then slow roast the garlic cloves. Leave them in their skins for cooking, but cut a slash across the centre to allow the insides to expand. If I am cooking a Sunday roast, I often throw in a few extra cloves of garlic to have garlic mash the next day. Just add the garlic pulp to your potatoes when mashing.

Another method is to finely cut the garlic and fry it in butter or olive oil until golden brown, and then add that to the mash and mix in. This is the style of mash here. I have used spring garlic as it is in season. For those of you unfamiliar with this, it resembles spring onion but has a pink tinge towards the roots, and has a lovely mild and sweet garlic flavour. I also deglazed the pan in which I cooked the cutlet and added this to the mash for extra flavour.

Share this:

  • Share on X (Opens in new window) X
  • Share on Facebook (Opens in new window) Facebook
  • Share on WhatsApp (Opens in new window) WhatsApp
  • Email a link to a friend (Opens in new window) Email
Like Loading...

Broccoli with Orange Butter & Tagliatelle with Chicory, Pine Nuts and Raisins

13 Wednesday Mar 2013

Posted by Nevenka in Food for One, Main Courses, Starters, Vegetable Dishes

≈ Leave a comment

Early morning sun viewed from my kitchen terrace

Early morning sun viewed from my kitchen terrace

We have had some lovely rain and now suddenly spring has arrived. The patio is atwitter with swallows recently returned from wintering in Africa and now busily repairing their mud nests. The air is starting to be filled with the scent of citrus blossom – very early this year – and the raucous cries of the Great Spotted Cuckoos looking for mates.  All the deciduous trees are already pruned and now that the winter harvest of limes have been gathered, we are starting with the pruning of those. The trees have vicious thorns, so thick gloves and long handled secateurs are necessary. Once the pruning is done, then a feed of horse manure and iron chelate will be given to each tree, the groups of baby limes will be thinned out and then they can be left to enjoy growing in the spring sunshine. Lime trees being tropical don’t like even the small amount of cooler weather that we have here and always look a bit scrappy and sad at this time of the year, but the boost of fertilizer followed by some warmth will transform them into the lush green trees that they should be.IMG_0070

In the vegetable garden  the cycle continues of sowing, maturing and harvesting. There are continually salad crops, right now being harvested are a variety of chicories and endives, Florence fennel and three types of lettuce. I have seedlings of more lettuce, chicory and oriental greens just about ready to go in the ground. The mange toute peas have been fantastic this winter and are just coming to an end. I had sown some French beans to follow on, but it looks as though the birds might have stolen their heads as soon as they were out of the ground, so I am going to have to resow those.

With the early warmth I am thinking that I may be able to start sowing some of the summer vegetables – aubergines, beetroot, peppers, courgettes.  For some of these I can buy seedlings very cheaply from the local market.IMG_0082

Just starting to be ready are the asparagus and purple sprouting broccoli. The very first head of broccoli this season, I had with orange butter as a starter, absolutely delicious. Butter sauces are a little out of favour at the moment with the concerns with cholesterol and saturated fats, but I would rather have the occasional bit of real butter than weird tasting margarines made with emulsifiers and who knows what base oil. You can of course use green broccoli for this or the green Romanesco cauliflower, white cauliflower I think is too bland for this sauce. Asparagus, either green or white are both complemented well the flavour of the orange butter.

BROCCOLI WITH ORANGE BUTTER

Per person

3-6 florets of Broccoli depending on the size

15 grams butter

Grated zest of a quarter of an orange plus 1 tablespoon of juice

Cook the broccoli for a few minutes in salted boiling water until cooked but still with some bite. You can use your serving plate as a lid and warm it at the same time.

Meanwhile put the butter, orange juice and grated zest into a small pan and heat over a low heat. Swirl the pan around continuously to mix the ingredients and get a smooth emulsion. The sauce wants to warm but never bubble, so do not go away and leave it heating. It is ready when the butter has melted and made a smooth warm sauce with the orange juice and zest.

Drain the broccoli and lay on a warm plate. Pour over the sauce. IMG_0099

Best eaten with your fingers scooping up the lovely orange flavoured butter as you go.

The tender and mild centres of the red and green chicories I have been using in salads, and the slightly tougher and more bitter outer leaves I have saved to cook.  This next recipe is inspired by the cooking of Sicily with its arab influences of using pine nuts and raisins in savoury dishes. I thought the sweetness of the dried fruit would off set the slight bitterness of the chicory and it does very well and the red chicory contrasts beautifully with the pale pasta and pine nuts. This sort of sauce can also be served as a vegetable on its own.

TAGLIATELLE WITH CHICORY, PINE NUTS AND RAISINSIMG_0085

Fresh tagliatelle – see post – The Beginners Guide to Making Fresh Pasta – for recipe

For the sauce per person –

olive oil for frying

1 clove garlic – finely chopped

20 gms pine nuts

20 gms raisins or currants

1 tinned salted anchovy – finely chopped

6 leaves green chicory – cut into fine strips

6 leaves red chicory – cut into fine strips

Parmesan for garnishing

Put the water for the pasta on to heat up, adding a dessertspoon of olive oil and a pinch of salt.

In a shallow pan heat some of the olive oil and add the garlic.

When it is starting to change colour to a golden colour, add the pine nuts and continue frying until they are golden all over.

Add the green chicory which is tougher than the red and stir fry for about 5 minutes.

Add the red chicory and continue frying for a further 3 minutes.

Add the chopped anchovy and the raisins. If the raisins are large then cut them in halves or quarters.

Continue stirring and cooking for a couple of minutes.

Once the pasta water is boiling add the pasta and let it come back to the boil. Cook the pasta for about 3 minutes.

Drain the pasta reserving a little of the water and add the pasta to the chicory mix. Stir well to mix together.

If it is very dry add a little of the reserved pasta cooking liquid.

Check the seasoning and add salt and freshly ground black pepper as required.

Serve with grated parmesan cheese to sprinkle over.

Share this:

  • Share on X (Opens in new window) X
  • Share on Facebook (Opens in new window) Facebook
  • Share on WhatsApp (Opens in new window) WhatsApp
  • Email a link to a friend (Opens in new window) Email
Like Loading...

Catalan Fish Stew – Suquet

27 Wednesday Feb 2013

Posted by Nevenka in Fish, Food for One, Main Courses

≈ 2 Comments

Tags

Almonds, Catalan Fish Stew, Linguine Vongole, Suquet

I thought while I was thinking of fish stew that I ought to share with you the recipe for one that originates from much closer to my home. This is a dish that is quintessentially Spanish. Garlicy Mediterranean fish in a tomato sauce, thickened and flavoured with toasted almonds and saffron, spiced with pimenton picante and served up with chunks of crusty country bread and green salad fresh from the huerta. And just as easy to cook for one or ten.

IMG_0055

For 4

Selection of fish and shellfish.

Monkfish is traditional, but now that it is endangered I choose other white meaty fish –Cod, Hake, Swordfish, Shark, Grey Mullet. Haddock and Conger Eel we don’t get in this part of the Med but would be suitable. Squid – if you are buying squid in a Mediterranean country be aware that there are several varieties of encephalopods and not all of them a tender.  Make sure that it is Calamar that you buy and not Poton which is tasty but requires a long slow cooking. If in doubt the calamares are usually a bit pricier and smaller in size than the poton.

For the shellfish

3-4 largish prawns per person – if they still have their heads and shells they will add more flavour to the stew.

3-4 mussels per person – in their shells

Clams – in their shells

Olive oil for frying

Half a head of garlic – peeled and finely chopped

1 medium onion – finely chopped

50 grams whole almonds

2 pinches saffron strands

1 heaped teaspoon pimenton picante / spicy paprika

3 large tomatoes – peeled, de seeded and chopped or 5 tablespoons passata

Fish stock

Flat leaved parsley – chopped

Prepare the fish. Remove any skin and bones and cut into large chunks. In some restaurants here they leave everything on and also use small fish like Red Mullet, but I find that Suquet is messy enough to eat with getting the shellfish out of their shells and peeling the prawns without having to try to skin and bone fish as you eat the dish as well. Also some fish skin has quite a different and stronger flavour than the flesh and this can ruin a dish.

Clean the mussels and clams and steam them open. Just put them in a frying pan, cover and put on a low heat. Turn them from time to time until they are all open. Put to one side until needed.

Put the saffron in a thick based pan over a low heat and toast to dry the strands and bring out the flavour. Be careful with this as the expensive strands can easily burn.

Put the strands in a mortar with a pinch of salt and grind up.

Put the almonds in the same pan as where the saffron was and toast moving from time to time until they are a light golden brown.

Add to the mortar and grind to a rough powder. You still want some bigger bits in the powder for texture. Put to one side until needed.

Heat the oil in a pan large enough to take all the ingredients for the stew. Add the garlic and fry over a low heat until golden.

Add the onions and fry until translucent.

Add the tomatoes and fry down for 5 minutes, or add the passata.

Put in the fish pieces, the prawns and the almond and saffron from the mortar. Season with the pimenton. Add the strained liquid from the mussels and clams.

Stir all to mix in the ingredients.

The liquid wants to just cover the fish, if it looks a bit dry add some fish stock, or chicken if you don’t have fish.

Cook slowly for 5-10 minutes until the fish is almost cooked.

Add the mussels and clams and chopped parsley.

Heat to warm through.

Check the seasonings and add salt and freshly ground black pepper as required. This is done at the very end as some shellfish can be quite salty and so until it and its stock are added you won’t know how salty the dish is.

Serve with crusty bread and a green salad.

The leftovers with extra clams added make a great sauce for pasta the next day……..

IMG_0066

Share this:

  • Share on X (Opens in new window) X
  • Share on Facebook (Opens in new window) Facebook
  • Share on WhatsApp (Opens in new window) WhatsApp
  • Email a link to a friend (Opens in new window) Email
Like Loading...

Spicy Fish Stew & Yuca Dumplings

20 Wednesday Feb 2013

Posted by Nevenka in Fish, Food for One, Main Courses

≈ Leave a comment

Tags

Fish Stew, Passata, Yuca Dumplings

IMG_0033  Here is the fish stew to go with yesterdays Yuca Dumplings as promised.

Per person

100 gms meaty fish – swordfish, salmon, conger eel, haddock

4 large prawns in the shells

Juice of half a lime

Half a teaspoon turmeric

Quarter of a teaspoon sumac

Quarter of a teaspoon chilli powder or half a teaspoon fresh finely chopped chilli

Quarter of a teaspoon fresh thyme finely chopped or half that amount of dried thyme

Salt and freshly ground black pepper

Olive oil for frying

Half a sweet red pepper cut into chunks

Green beans, washed and cut into slices

20 gms sweetcorn, either frozen or tinned is fine

Small jar passata – the recipe can be found in the preserves section

3 or 4 yuca dumplings

Cut the fish into biggish chunks. Put into a bowl with the prawns. You can remove the shells from the prawns at this stage if you prefer, but they do add extra flavour to the dish.

Pour over the lime juice and add all the spices; turmeric, sumac, chilli, thyme, and season with salt and pepper.

Mix well to coat the fish pieces and prawns with the marinade. Leave for an hour for the spices to permeate the fish.

When this time has passed, heat some oil in a shallow saucepan and add the peppers. Fry for 5 minutes or so.

Add the beans and fry for another 2-3 minutes.

Add the passata and stir in. Turn the heat down and let the vegetables cook for 5 minutes.

Add the fish and any juices with it. Gently stir in. Leave to cook for 5-7 minutes until just on the verge of being done.

Add the sweetcorn and the dumplings. Cook for a few minutes to heat them through turning the dumplings in the sauce to coat them.

Serve.

Share this:

  • Share on X (Opens in new window) X
  • Share on Facebook (Opens in new window) Facebook
  • Share on WhatsApp (Opens in new window) WhatsApp
  • Email a link to a friend (Opens in new window) Email
Like Loading...
← Older posts
Newer posts →

Blog at WordPress.com.

Privacy & Cookies: This site uses cookies. By continuing to use this website, you agree to their use.
To find out more, including how to control cookies, see here: Cookie Policy
  • Subscribe Subscribed
    • fincafood
    • Join 103 other subscribers
    • Already have a WordPress.com account? Log in now.
    • fincafood
    • Subscribe Subscribed
    • Sign up
    • Log in
    • Report this content
    • View site in Reader
    • Manage subscriptions
    • Collapse this bar
 

Loading Comments...
 

    %d