• About
  • La Micaela Farm Shop

fincafood

~ culinary and horticultural life on a Spanish farm

Author Archives: Nevenka

Spicy Besan Cake

16 Thursday Nov 2023

Posted by Nevenka in breakfast, Main Courses, Starters, Vegan, Vegetarian

≈ Leave a comment

Tags

besan, Chickpea flour

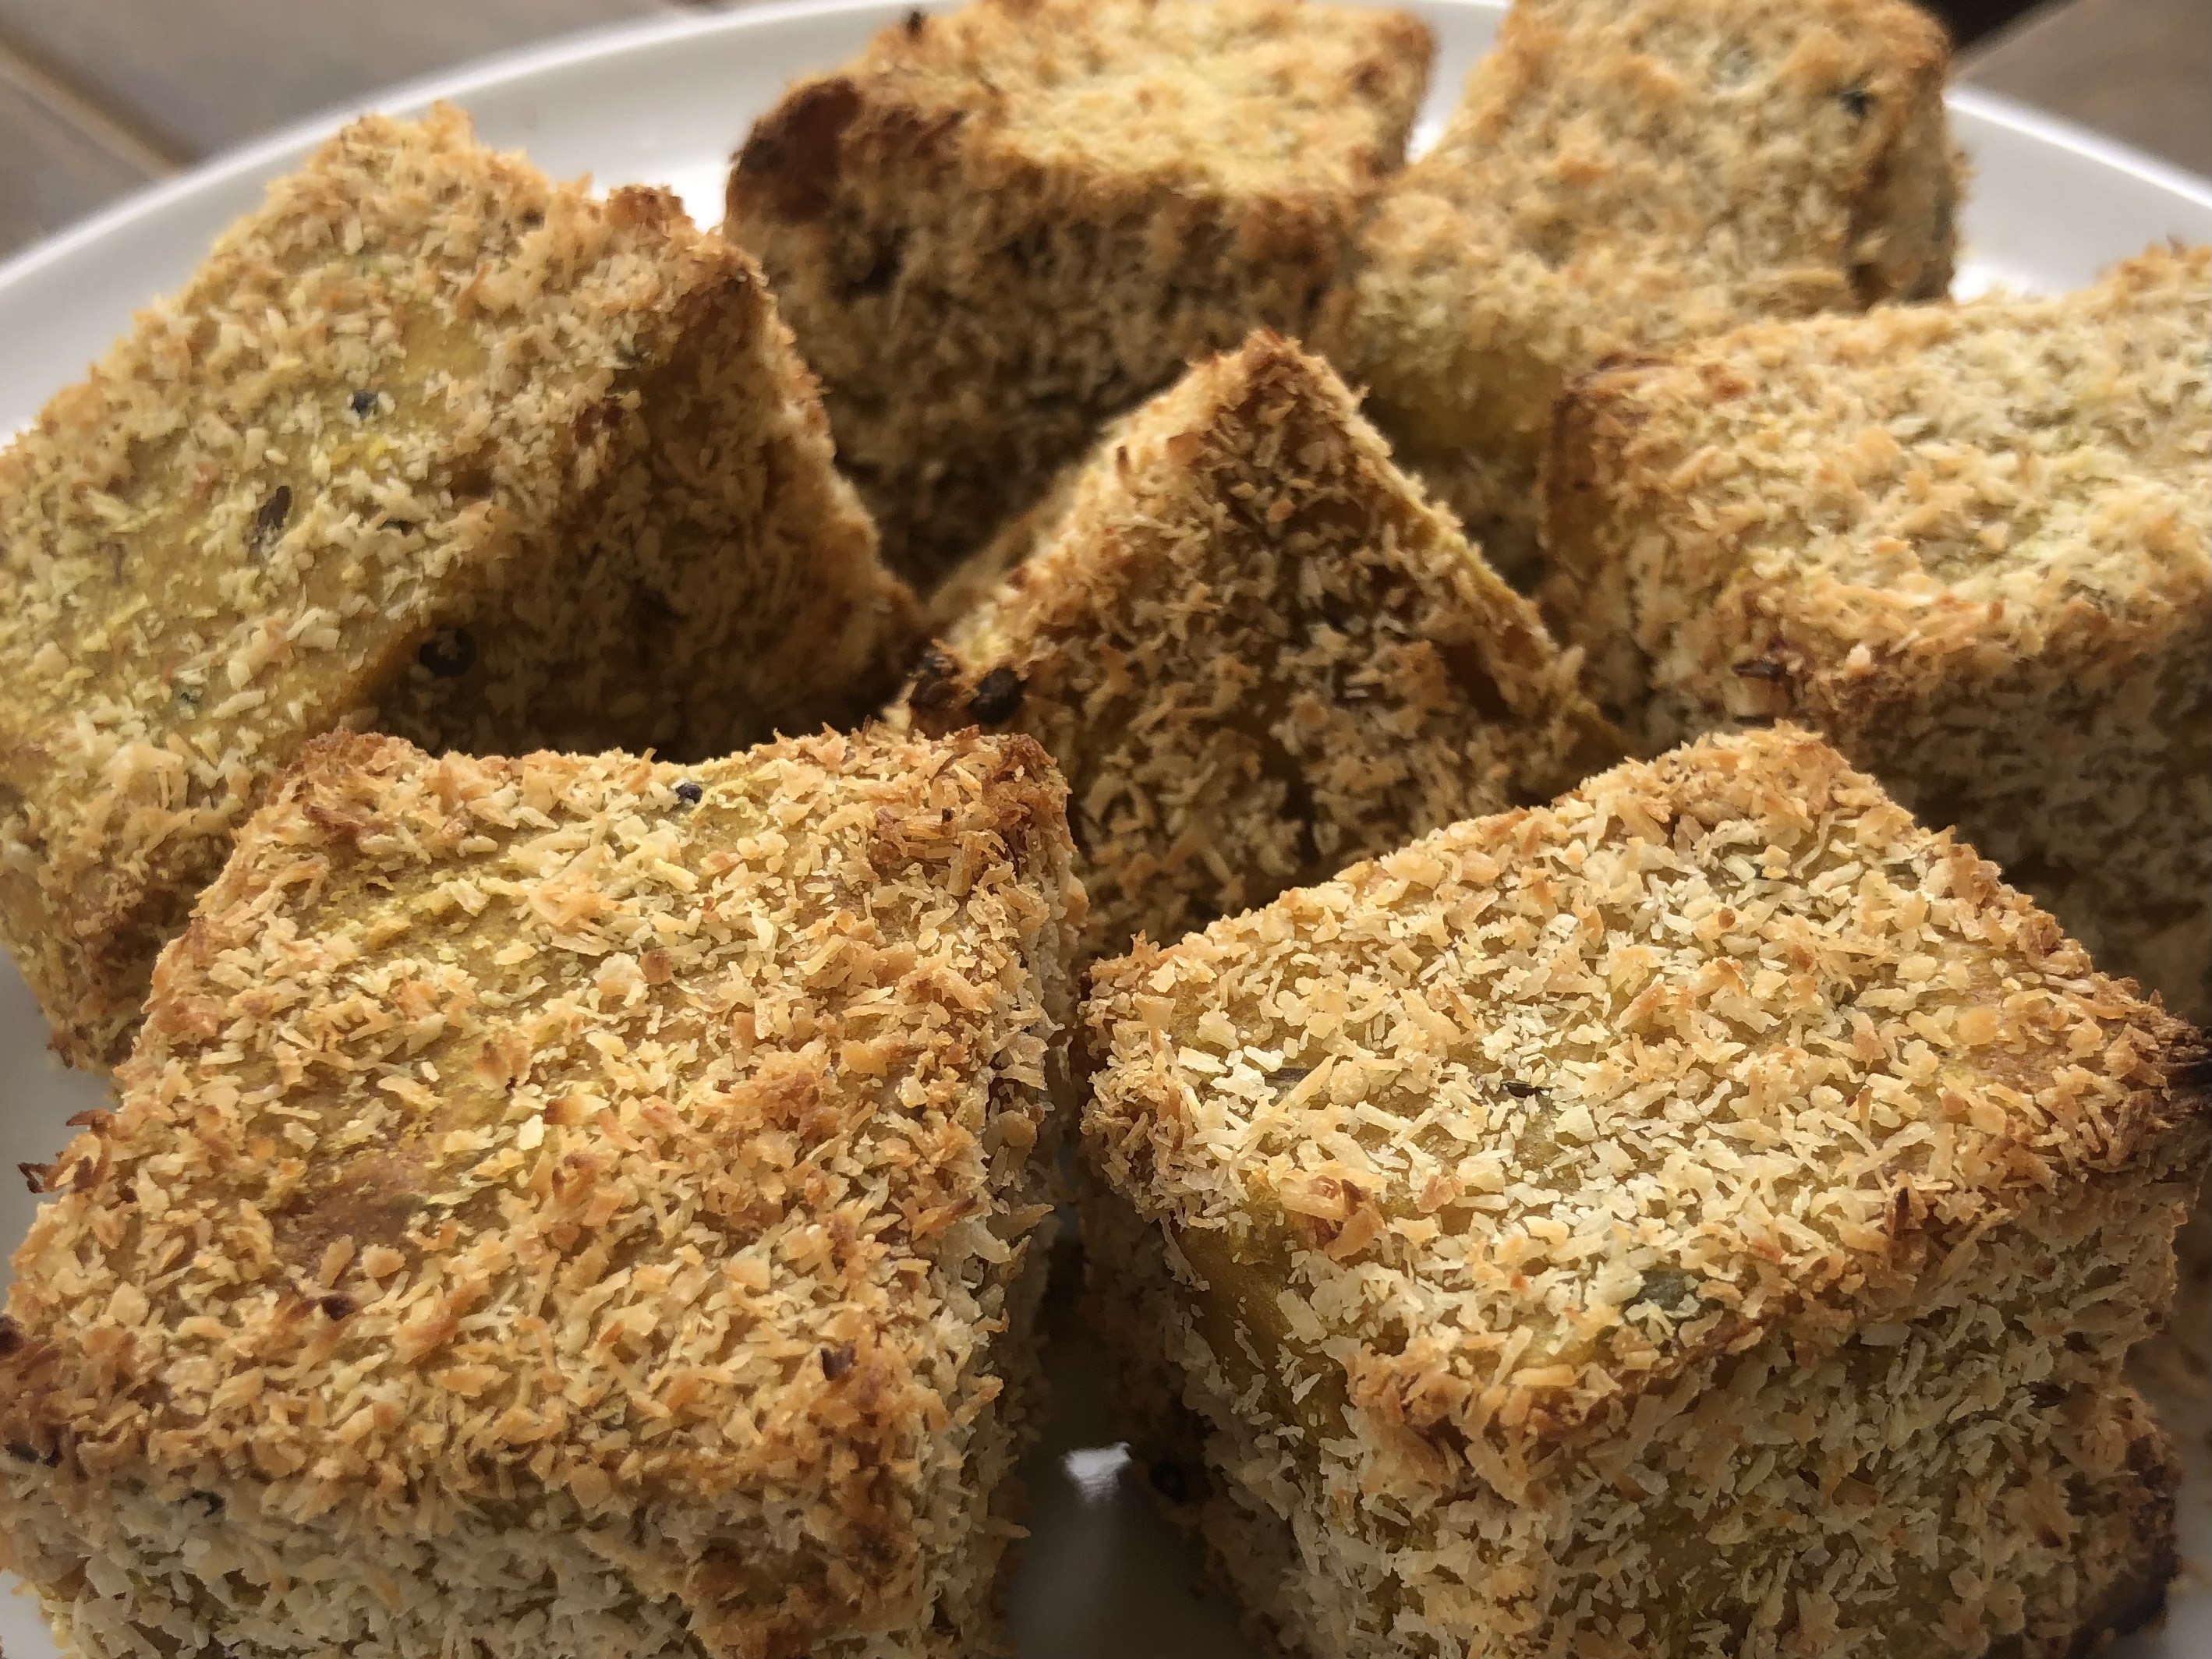
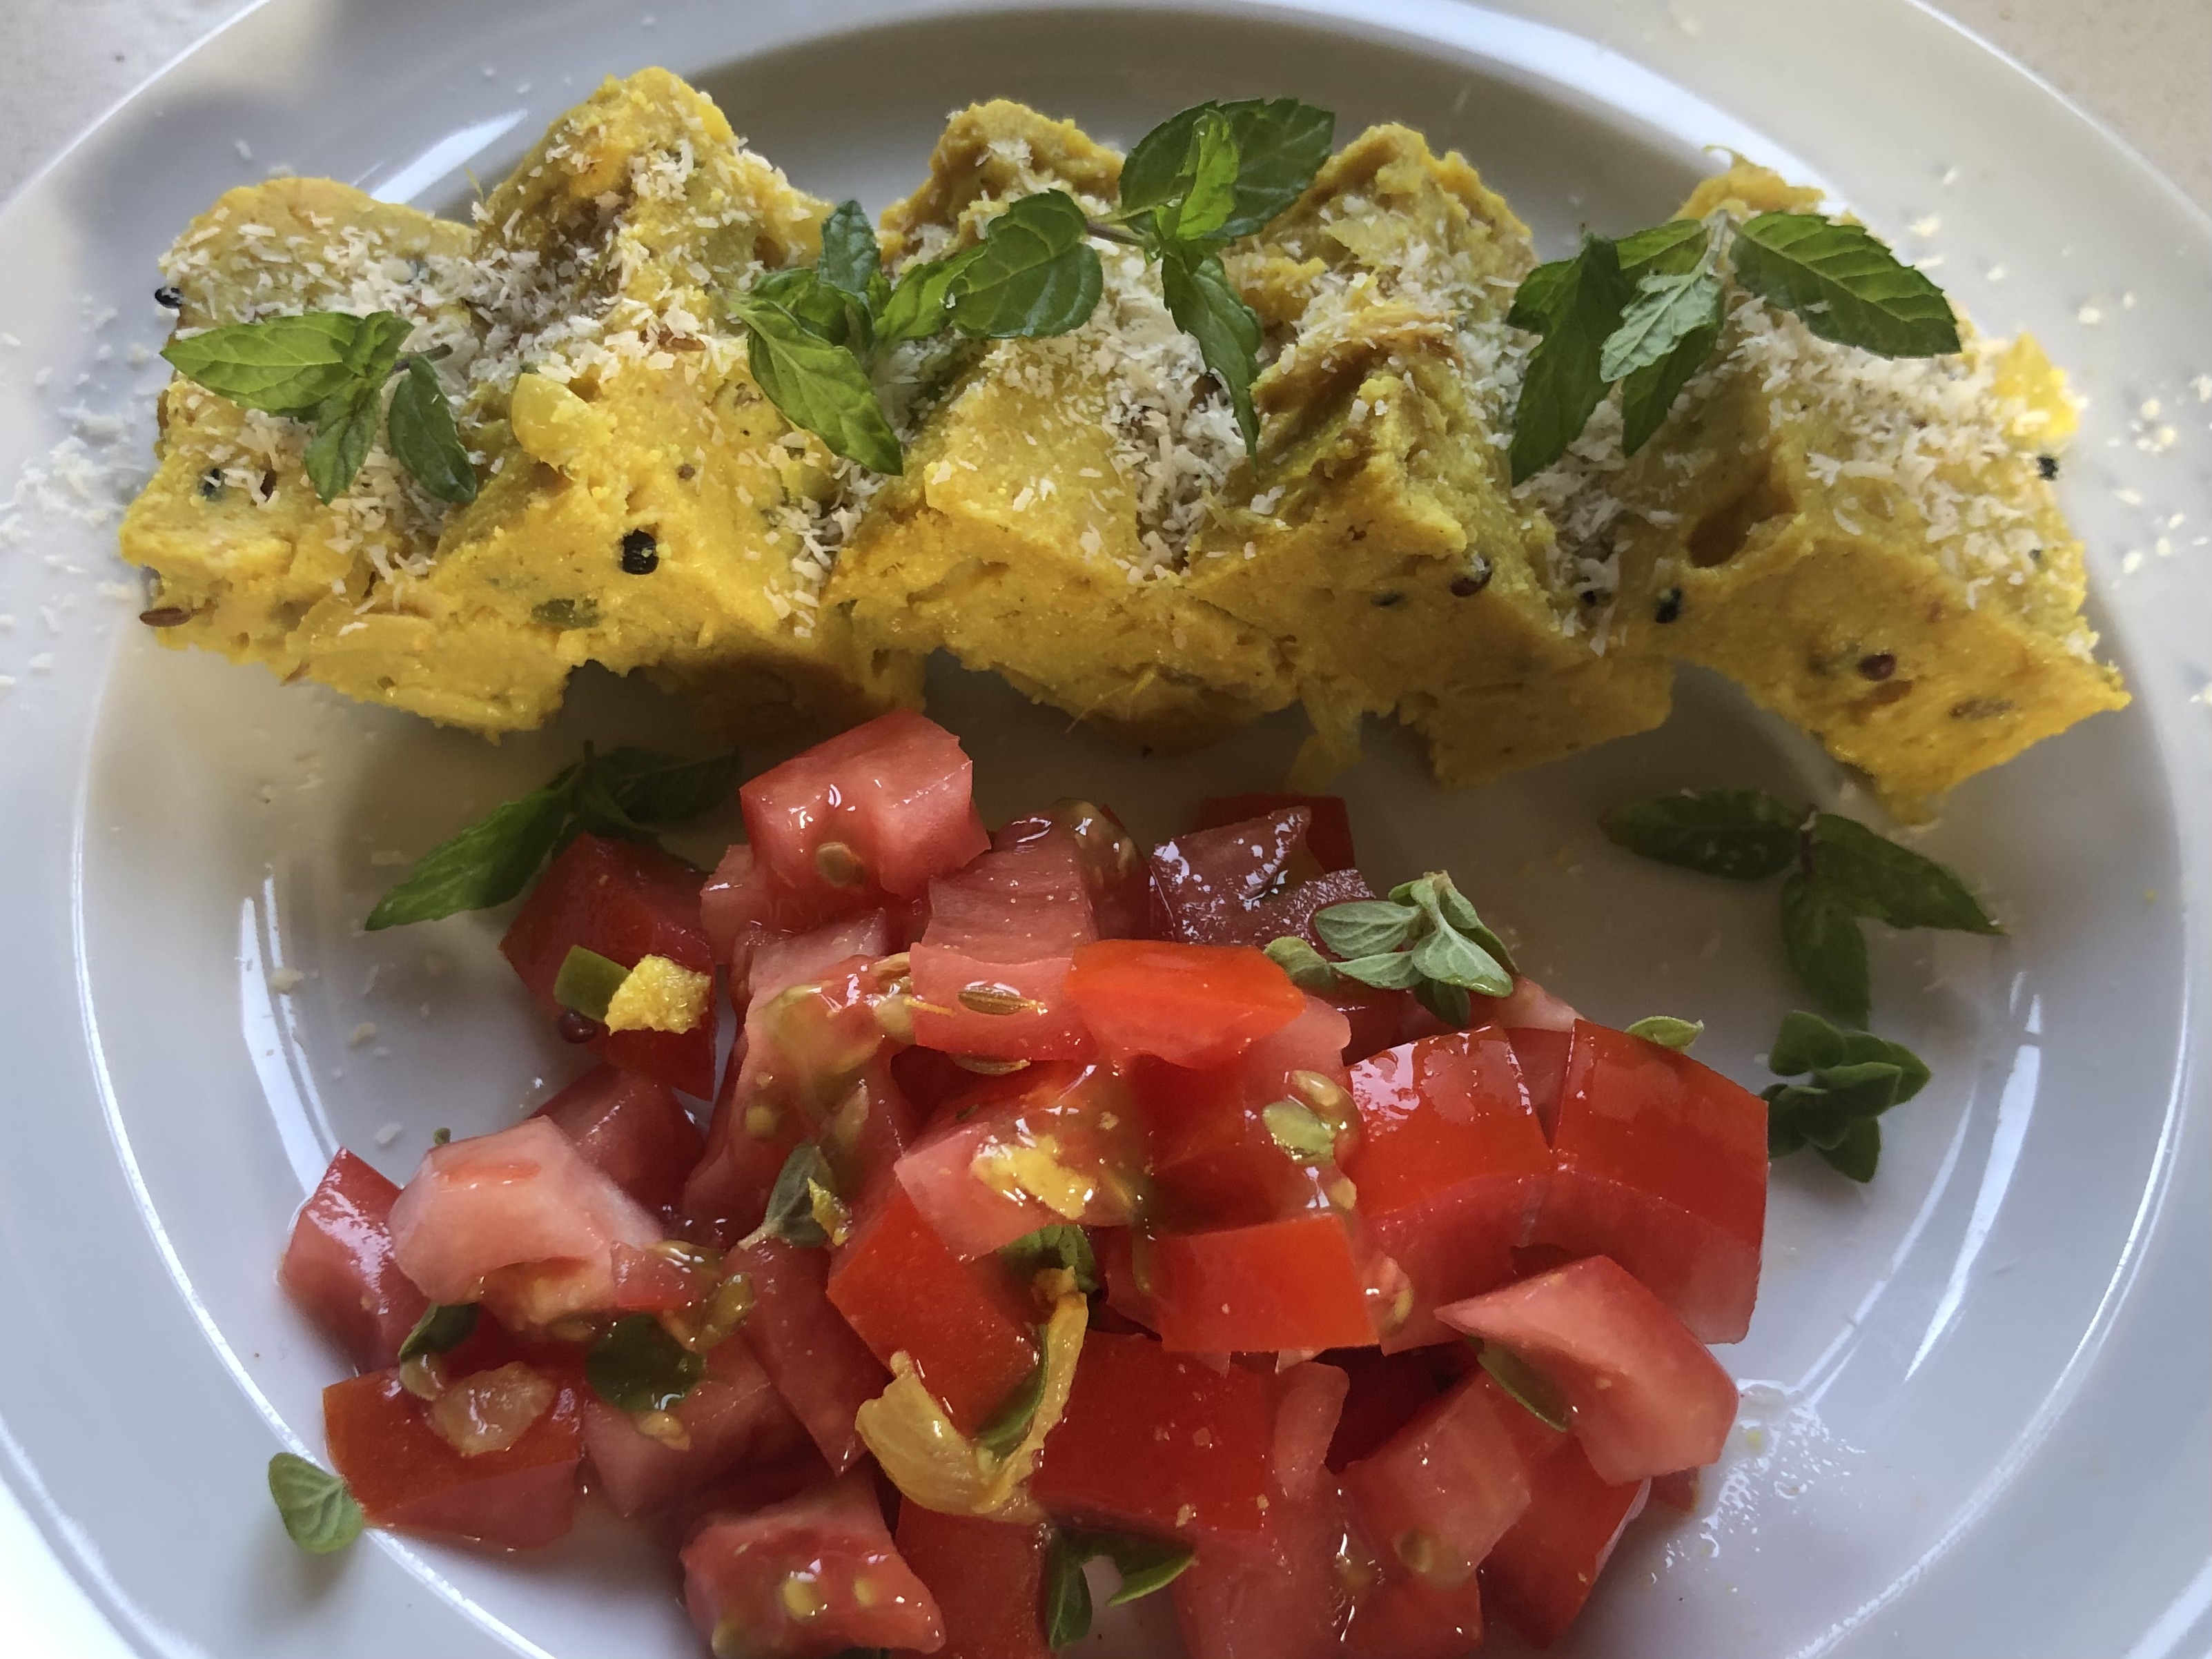
Continuing with recipes made with chickpea flour or besan, this super tasty cake is not complicated to make. You fry onions, garlic and ginger and then spices to make an intensely flavoured mix, then add chickpea flour and water to make a thick sauce, the cake is then spooned into an oiled dish and left to cool and set. That’s it! It can be eaten cold as pictured below or rolled in desiccated coconut and toasted in the oven.

Makes 2 good portions

1 onion – sliced

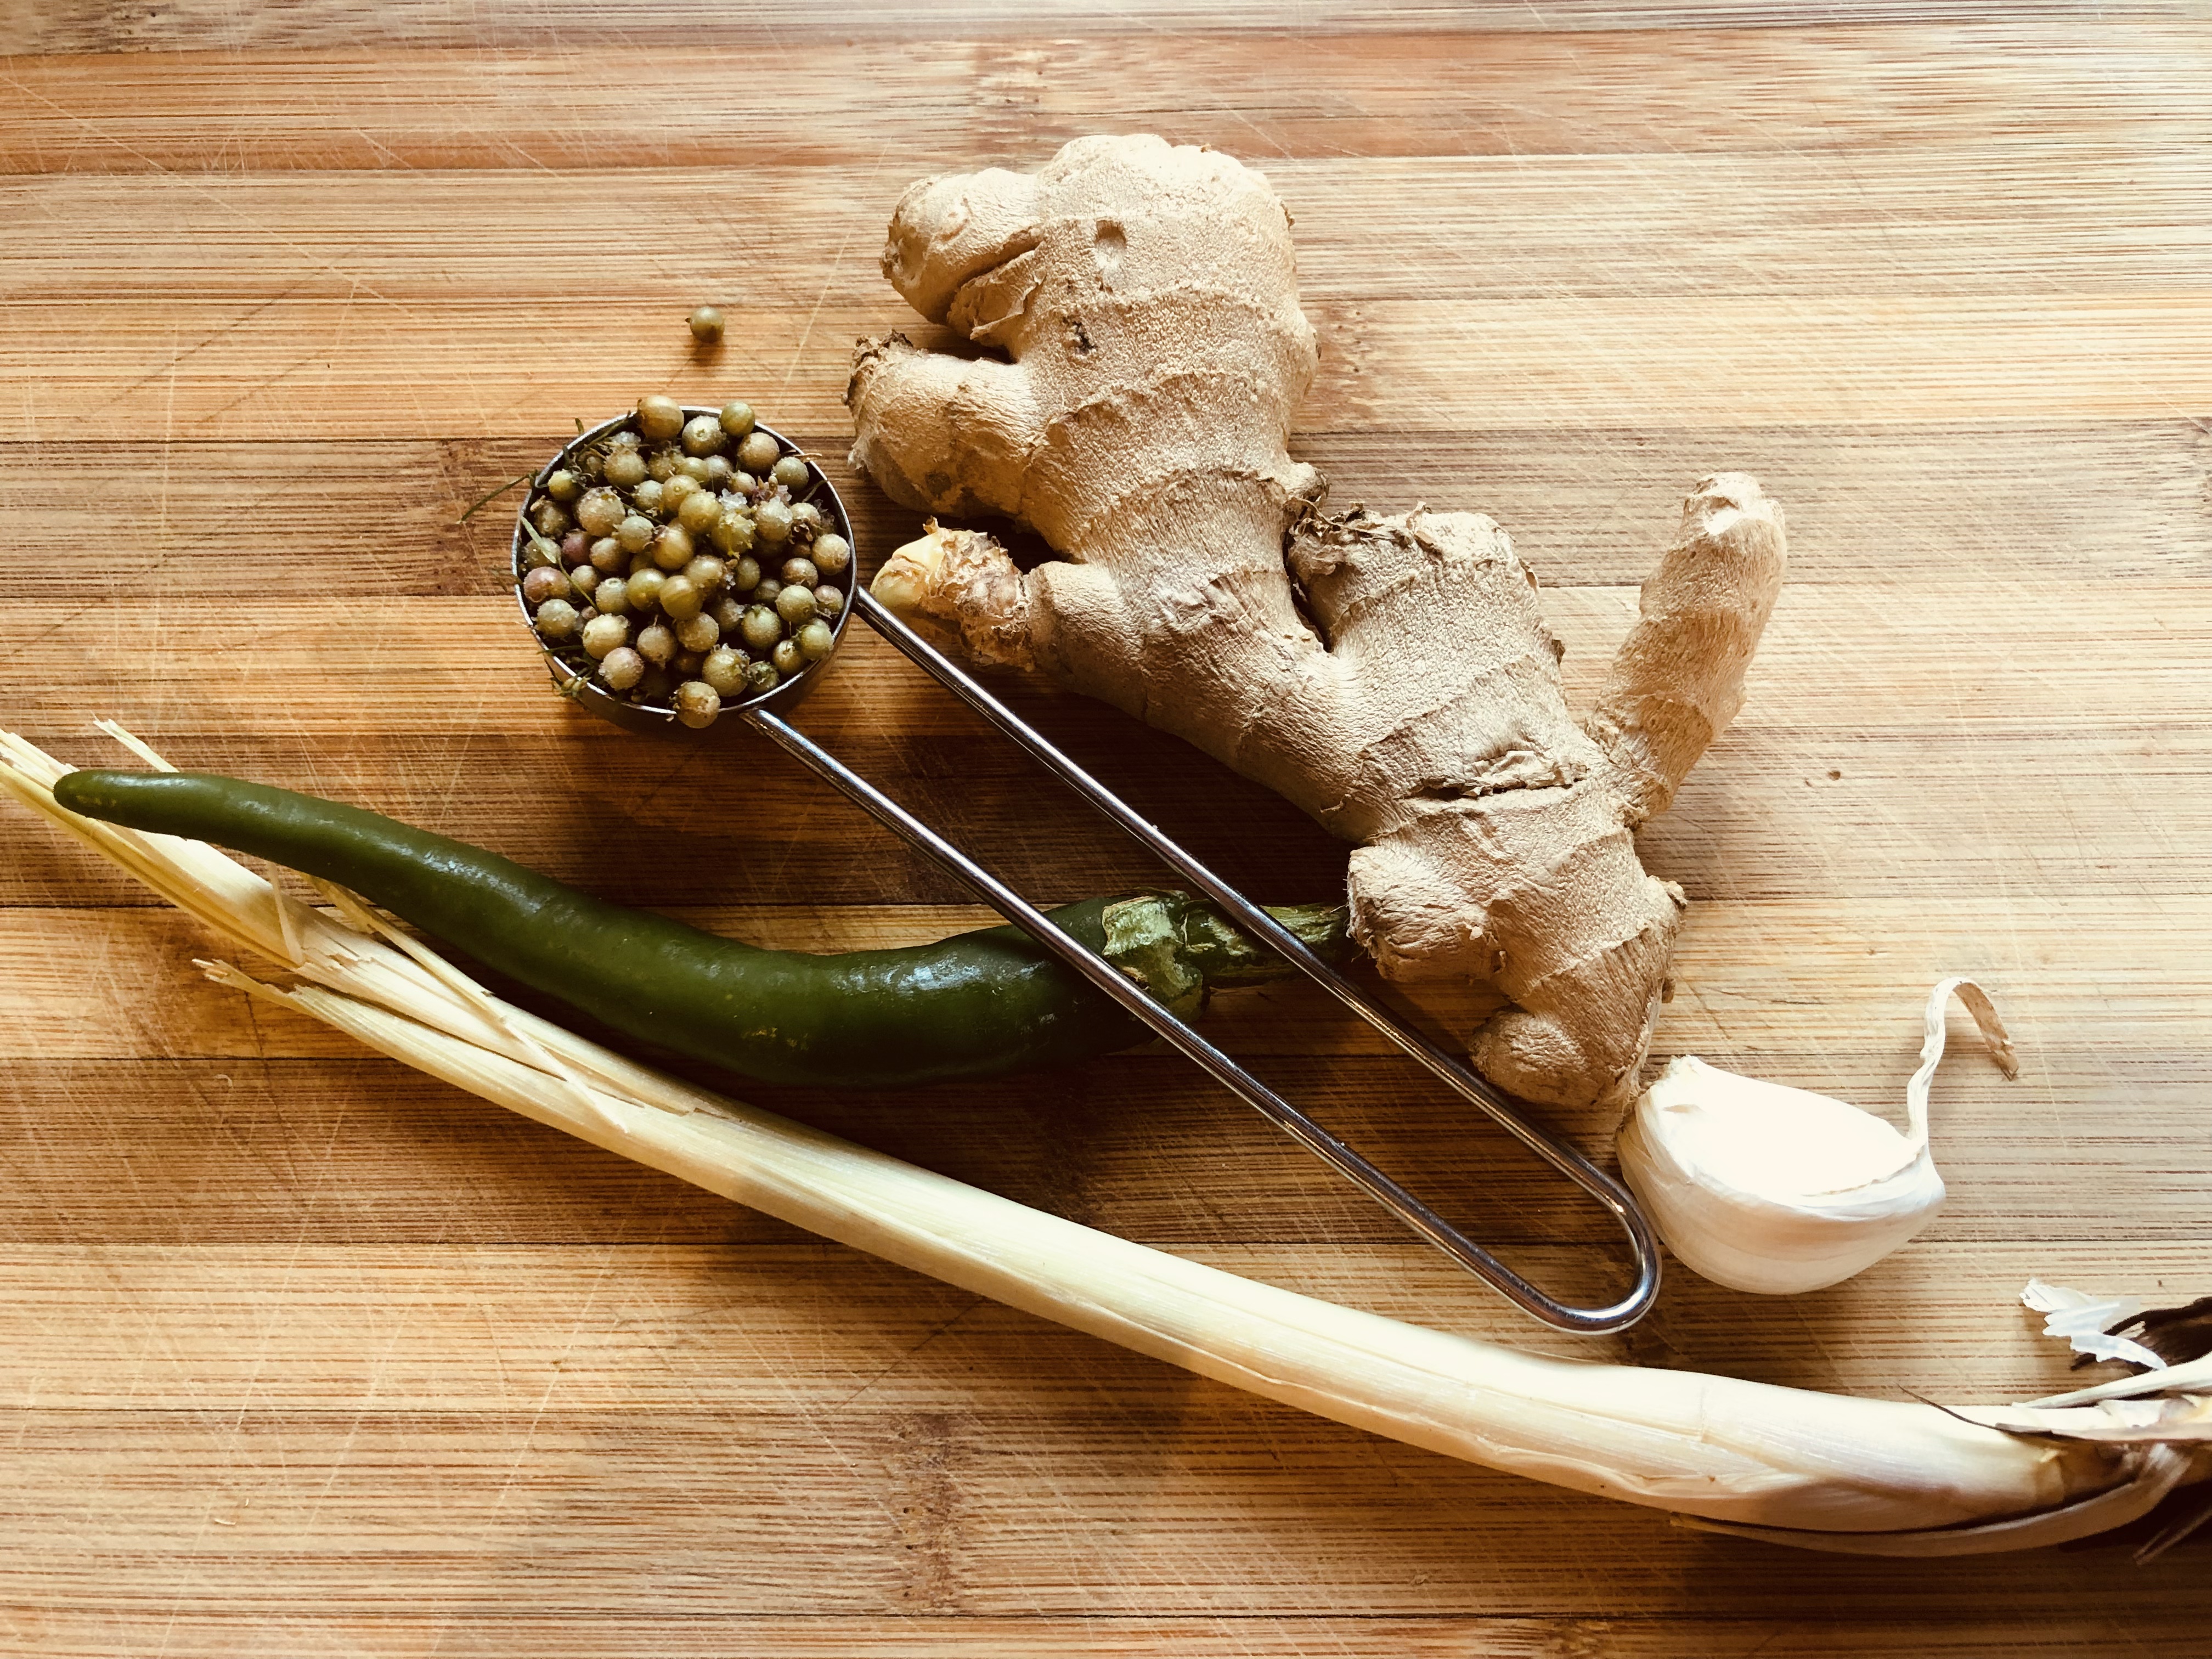
2 cloves of garlic – finely chopped

40 grams fresh ginger – cut into tiny batons

2-3 tablespoons olive oil

2 teaspoons panch poran – this is a mix of whole spice seeds in equal amounts – cumin, onion, fenugreek, fennel, and mustard.

seeds from 10 green cardamoms

1/2 teaspoon turmeric

1 fresh green chilli – finely chopped

150 grams chickpea flour

625 ml water

salt and freshly ground black pepper

desiccated coconut and fresh coriander to garnish

Heat the oil in a sauce pan, add the onions, garlic and fresh ginger and cook on a medium heat until soft and slightly golden.

Add the all spices and cook for a further five minutes.

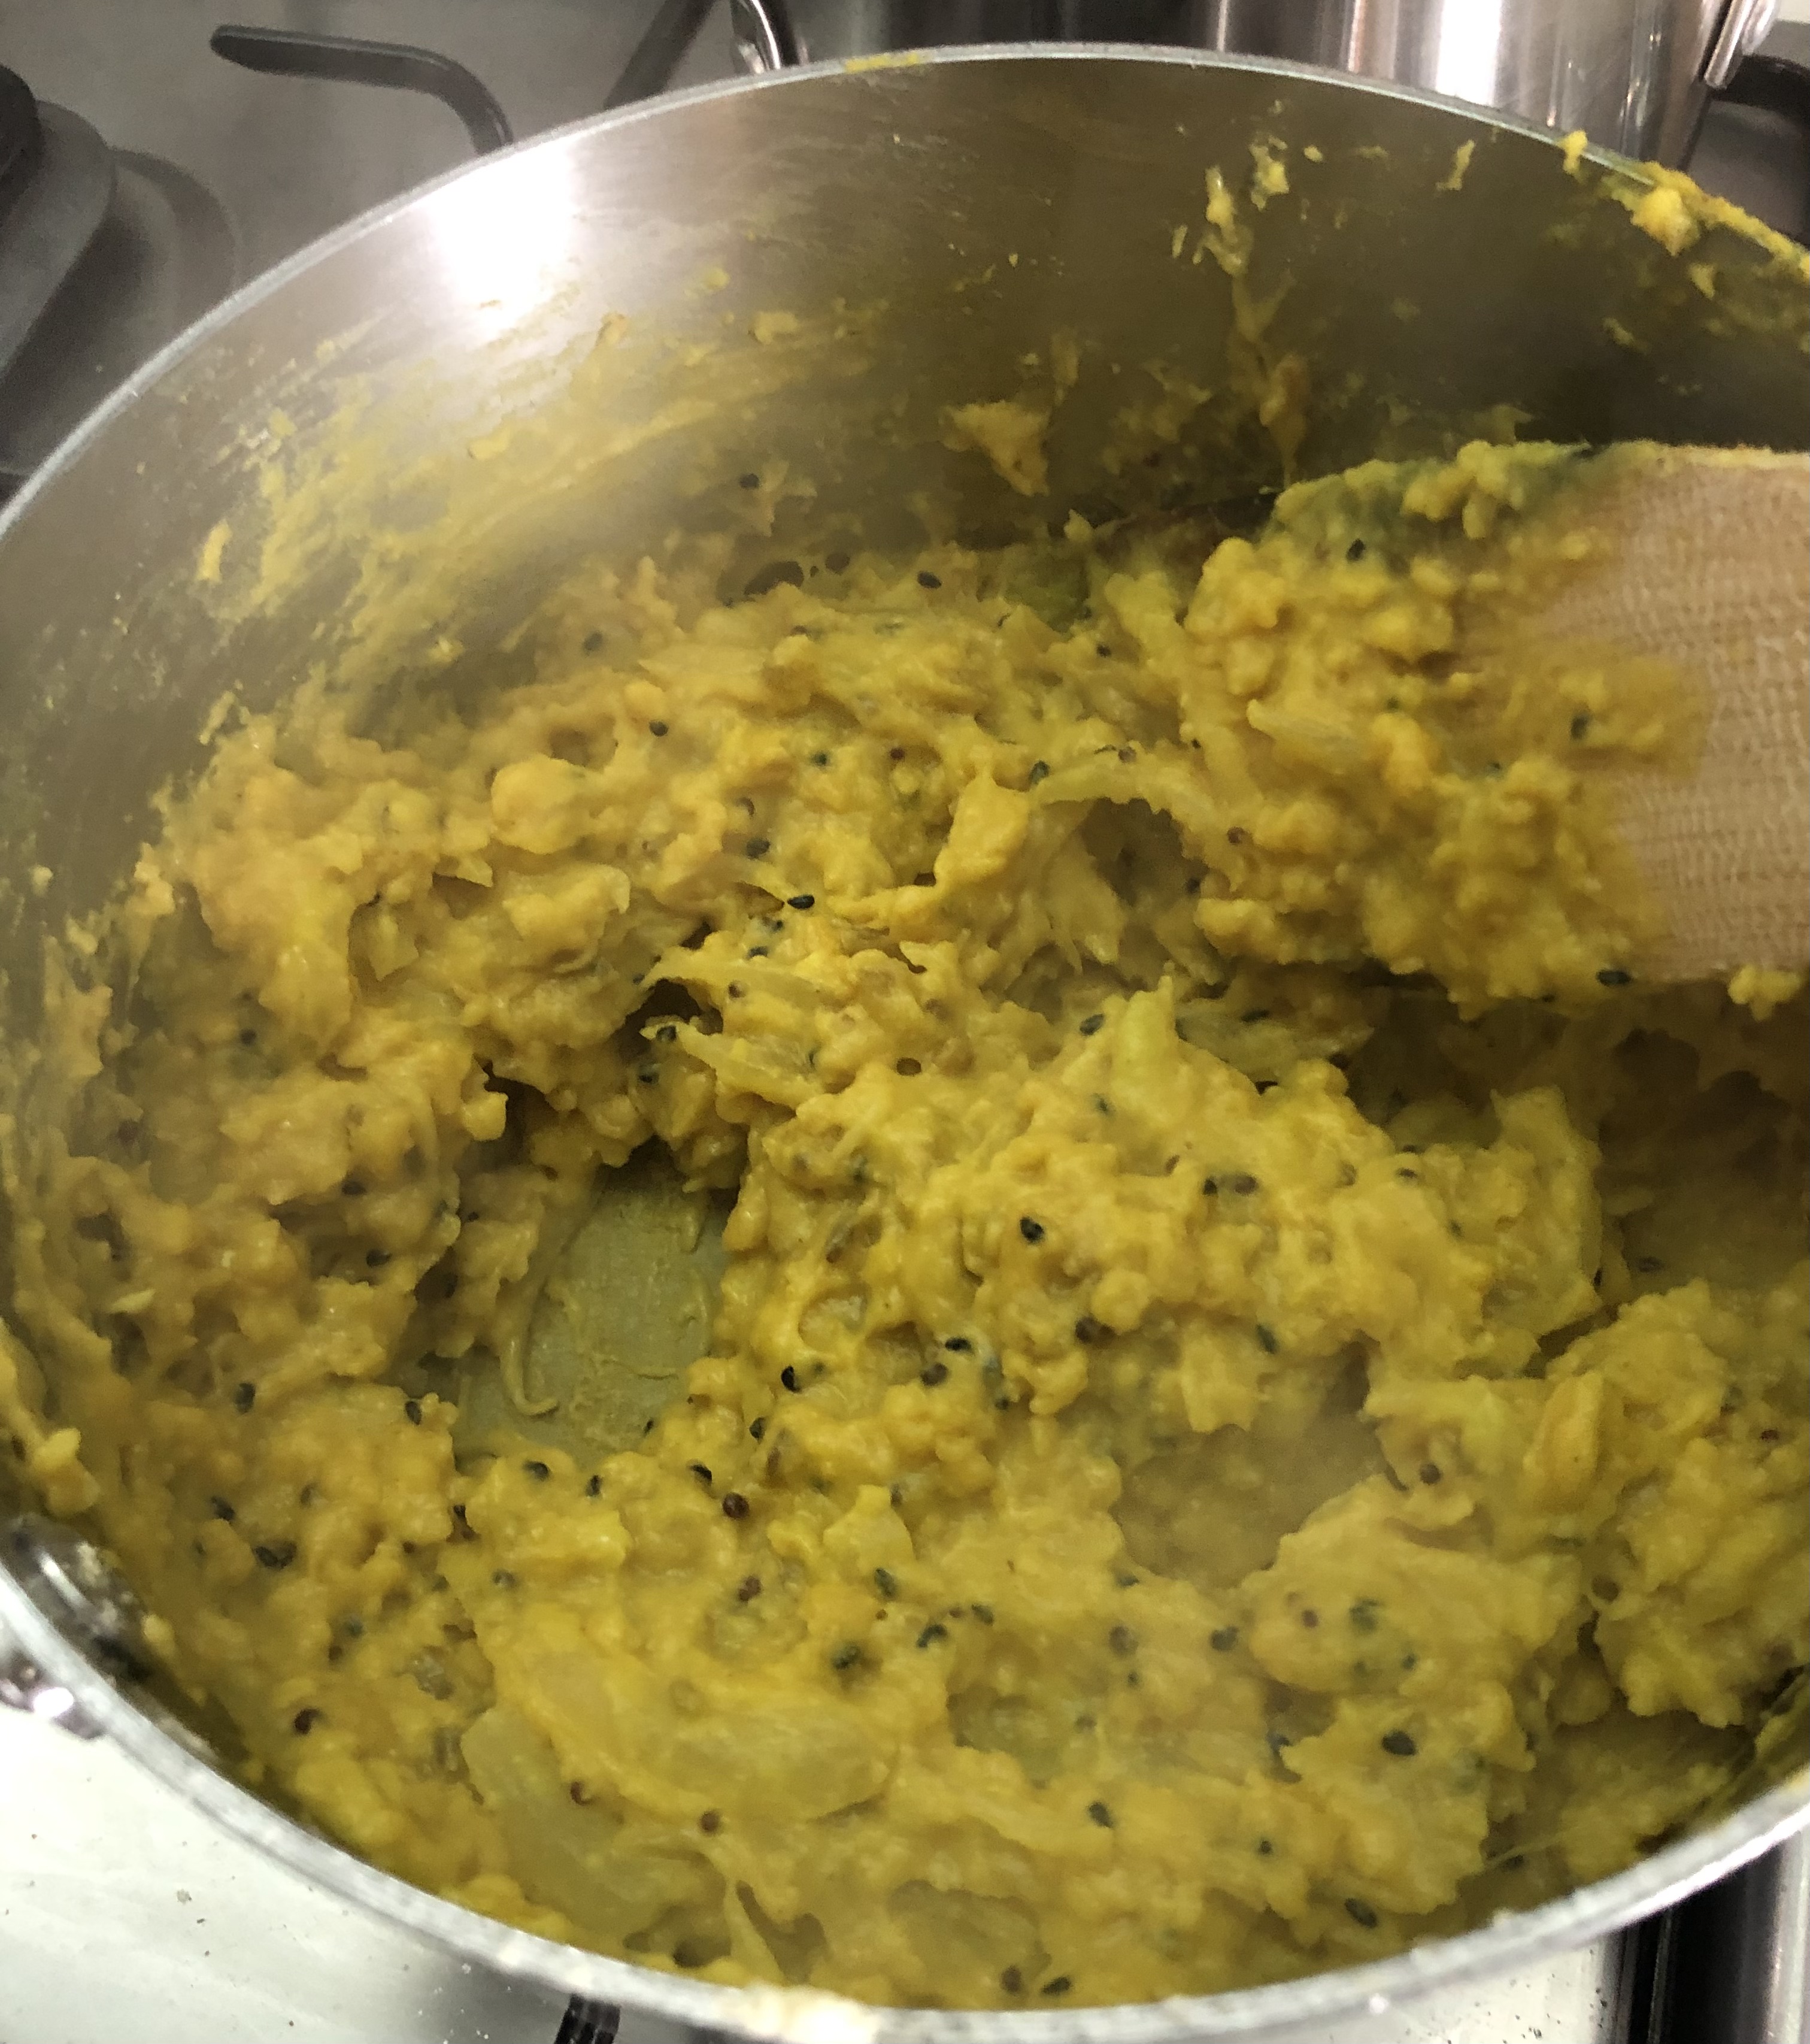
Put in the chickpea flour and slowly mix in the water stirring out any lumps.

Put on a medium heat and stir constantly, the mix will thicken and start to resemble a bechamel.
Keep cooking and stirring until the mixture is very thick and coming away from the sides of the pan.

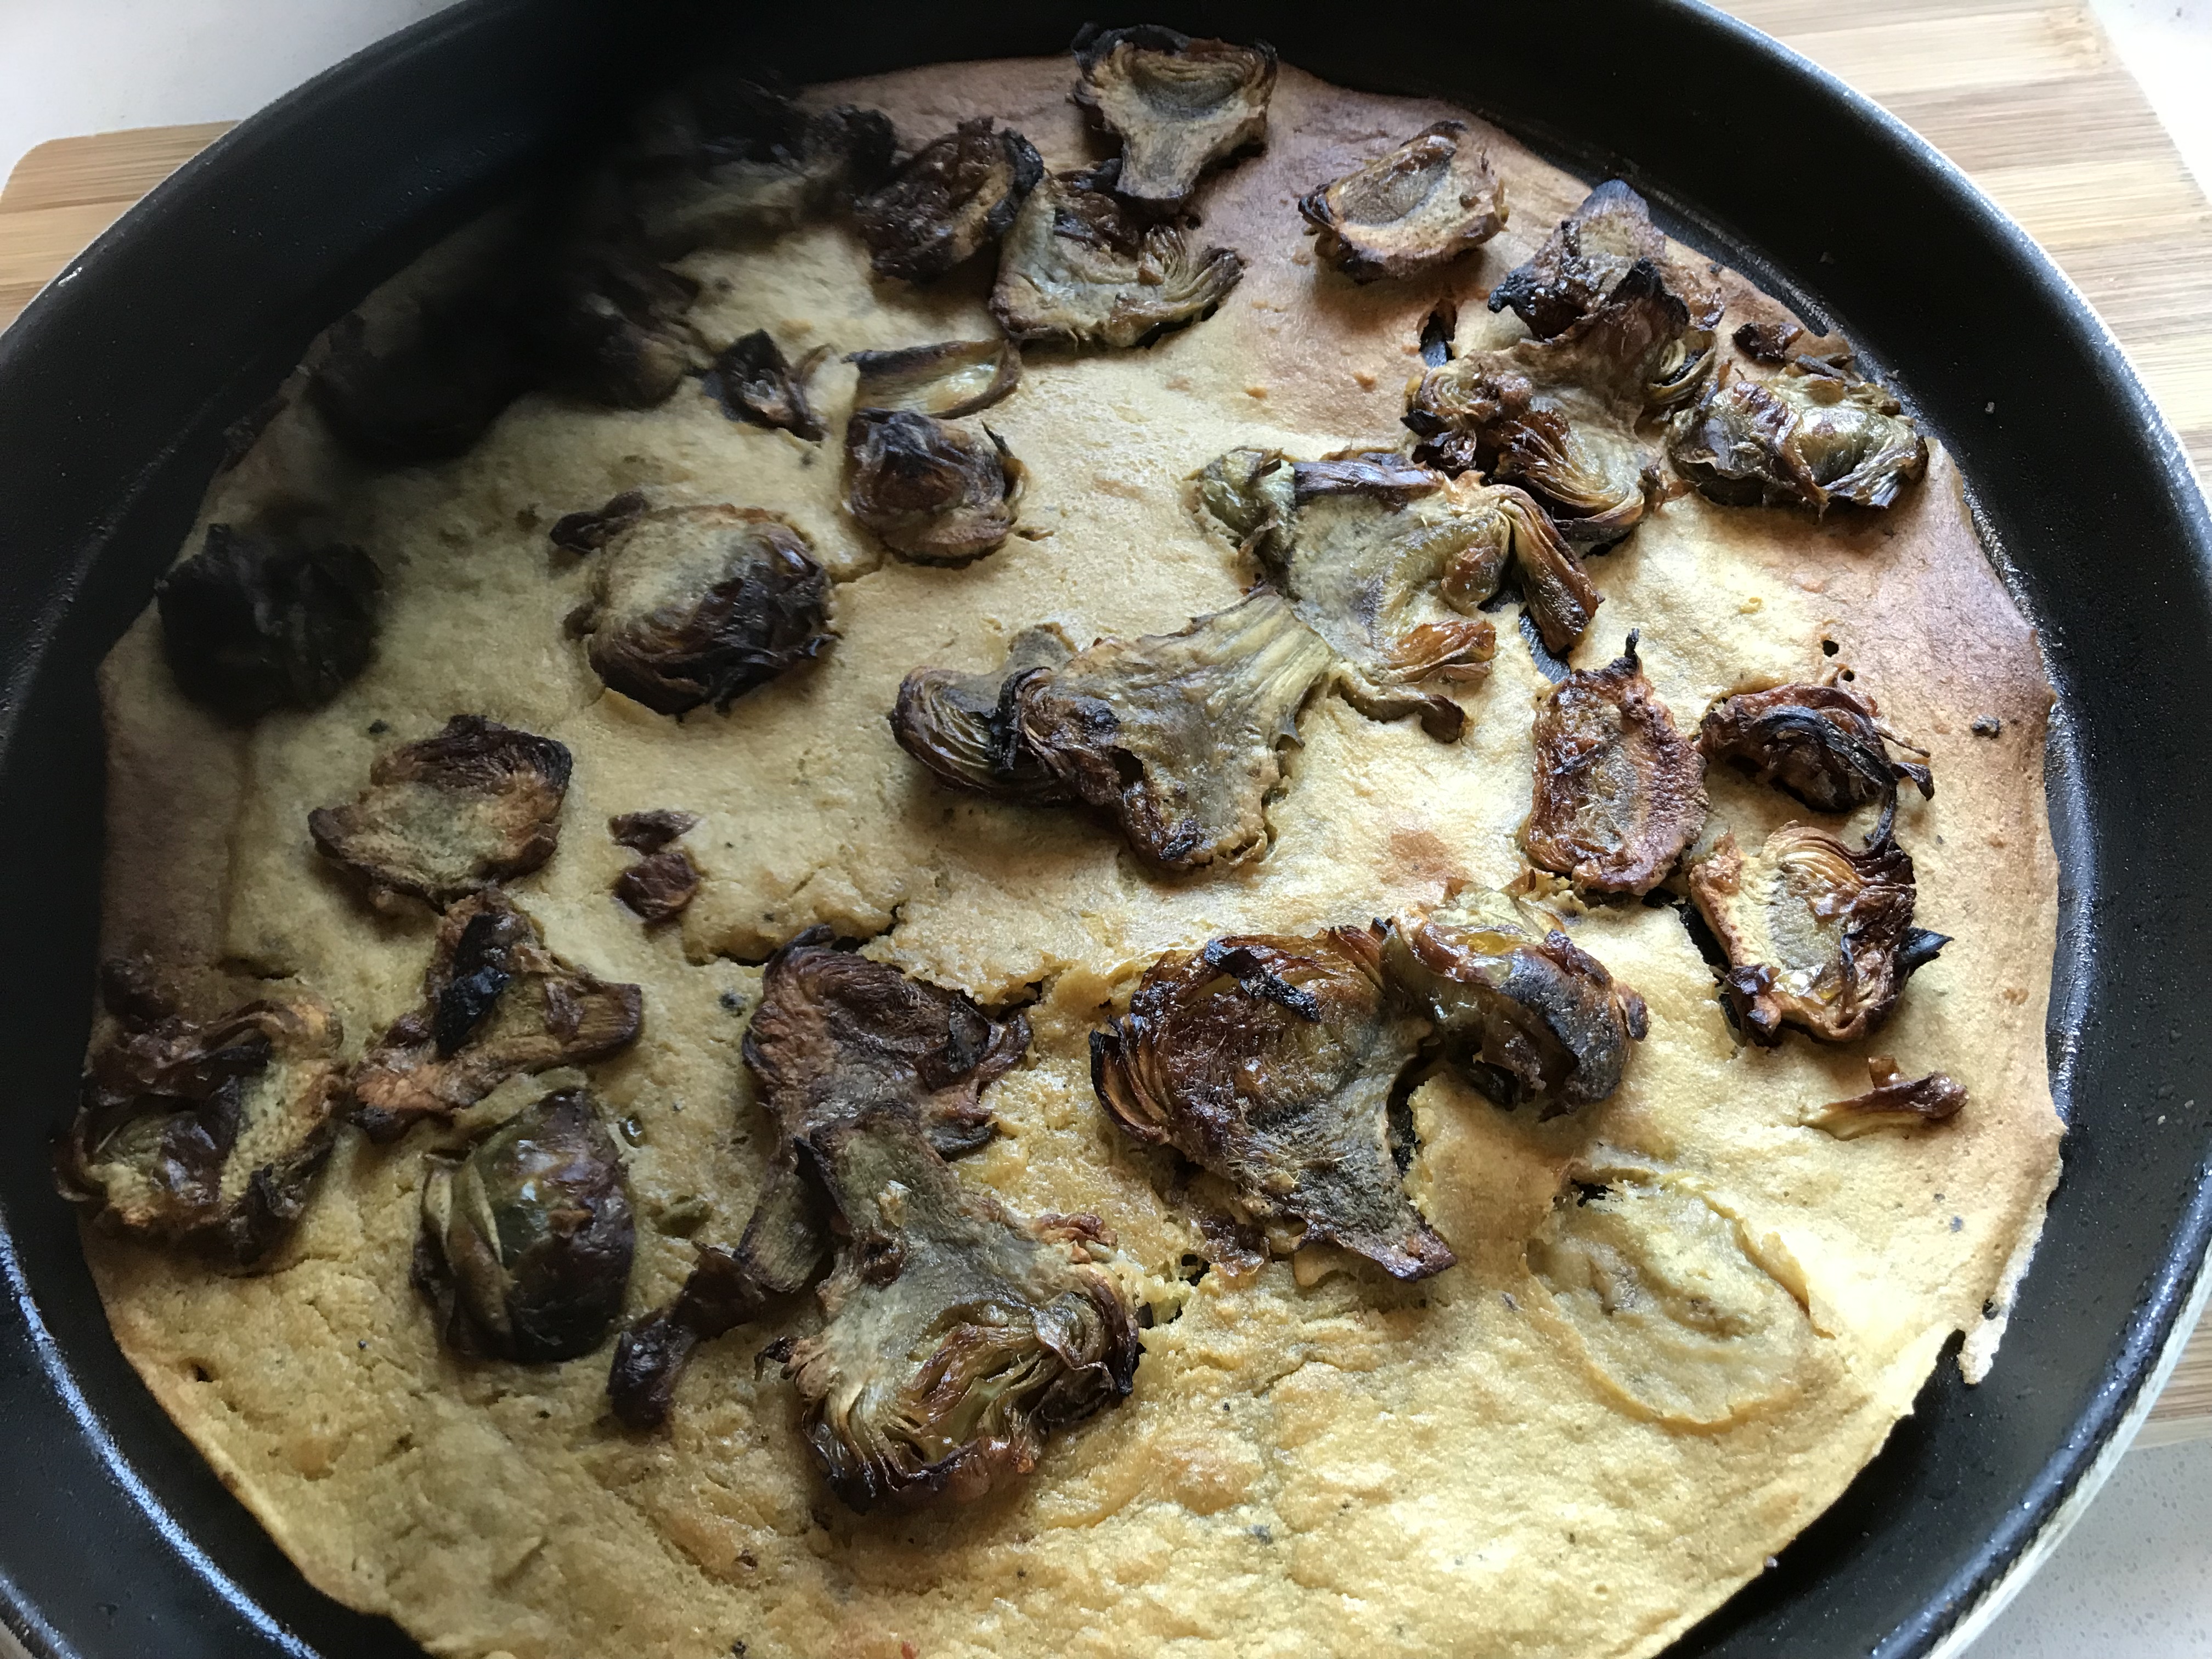
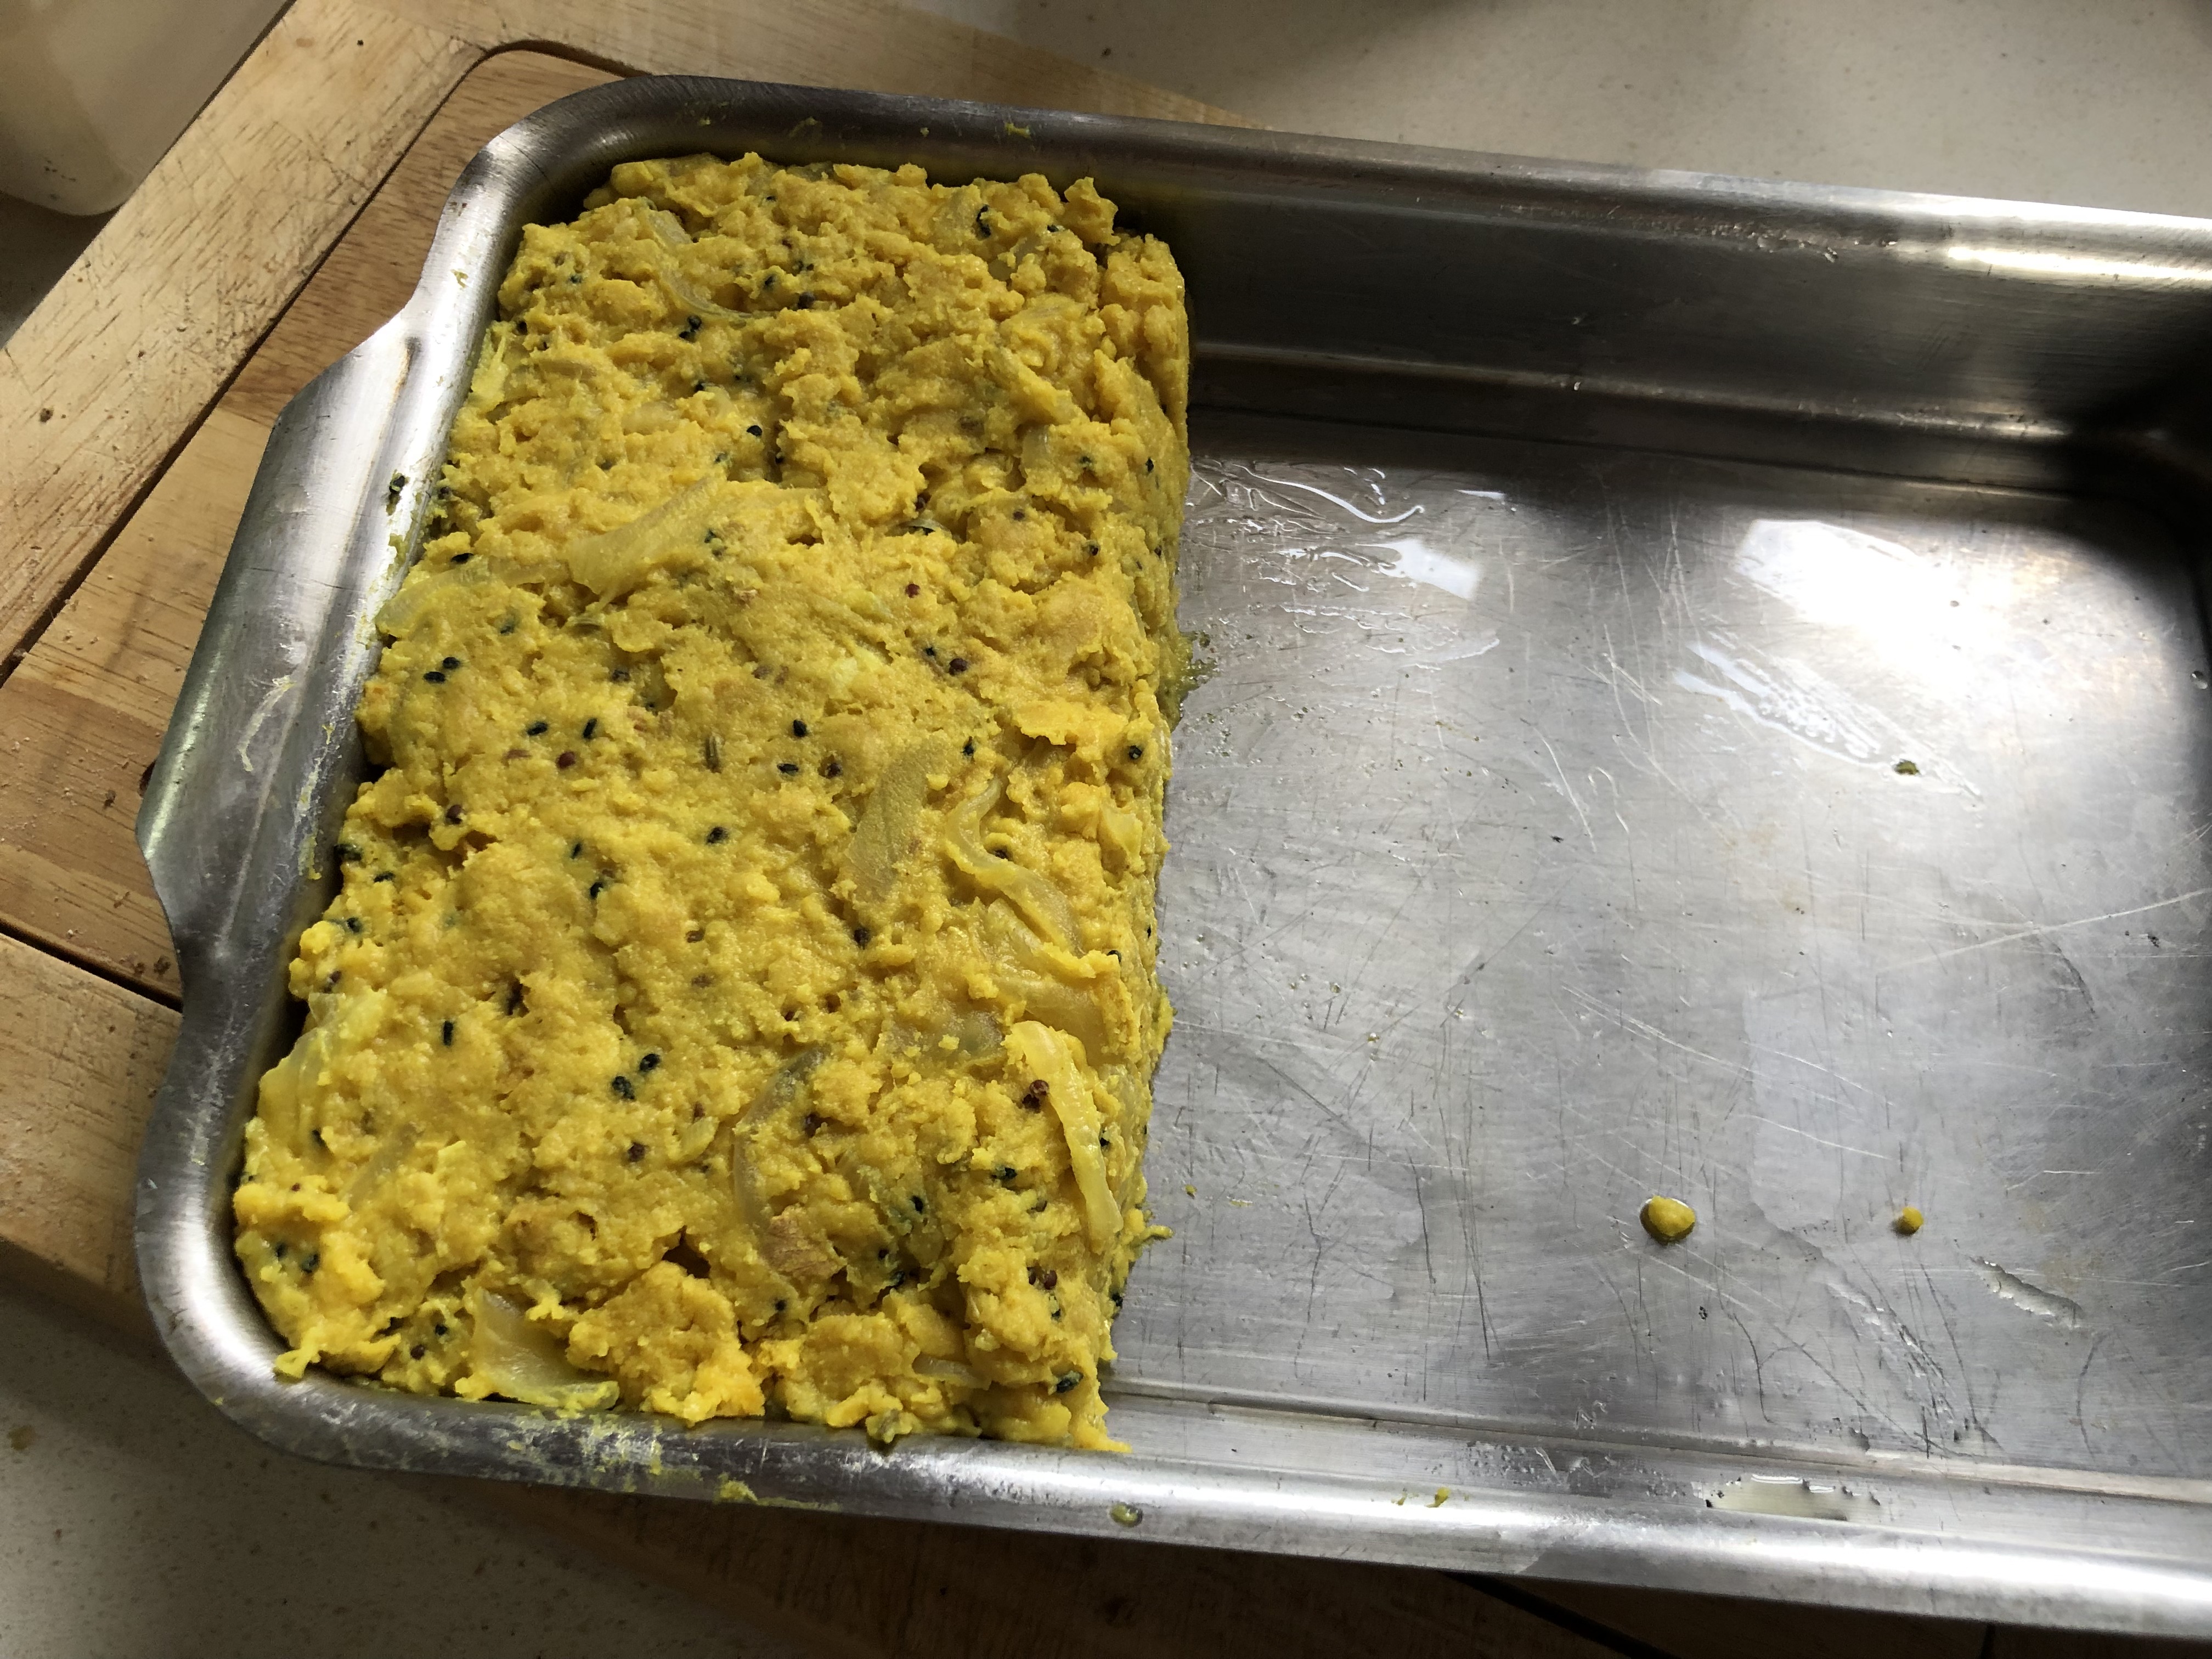
Let the mixture cool a bit in the pan before turning it out into an oiled square dish. Don’t worry if you haven’t a dish the right size, the mix will be quite solid and can shaped into a bigger dish as below. You want the cake to be about 2 centimetres thick.

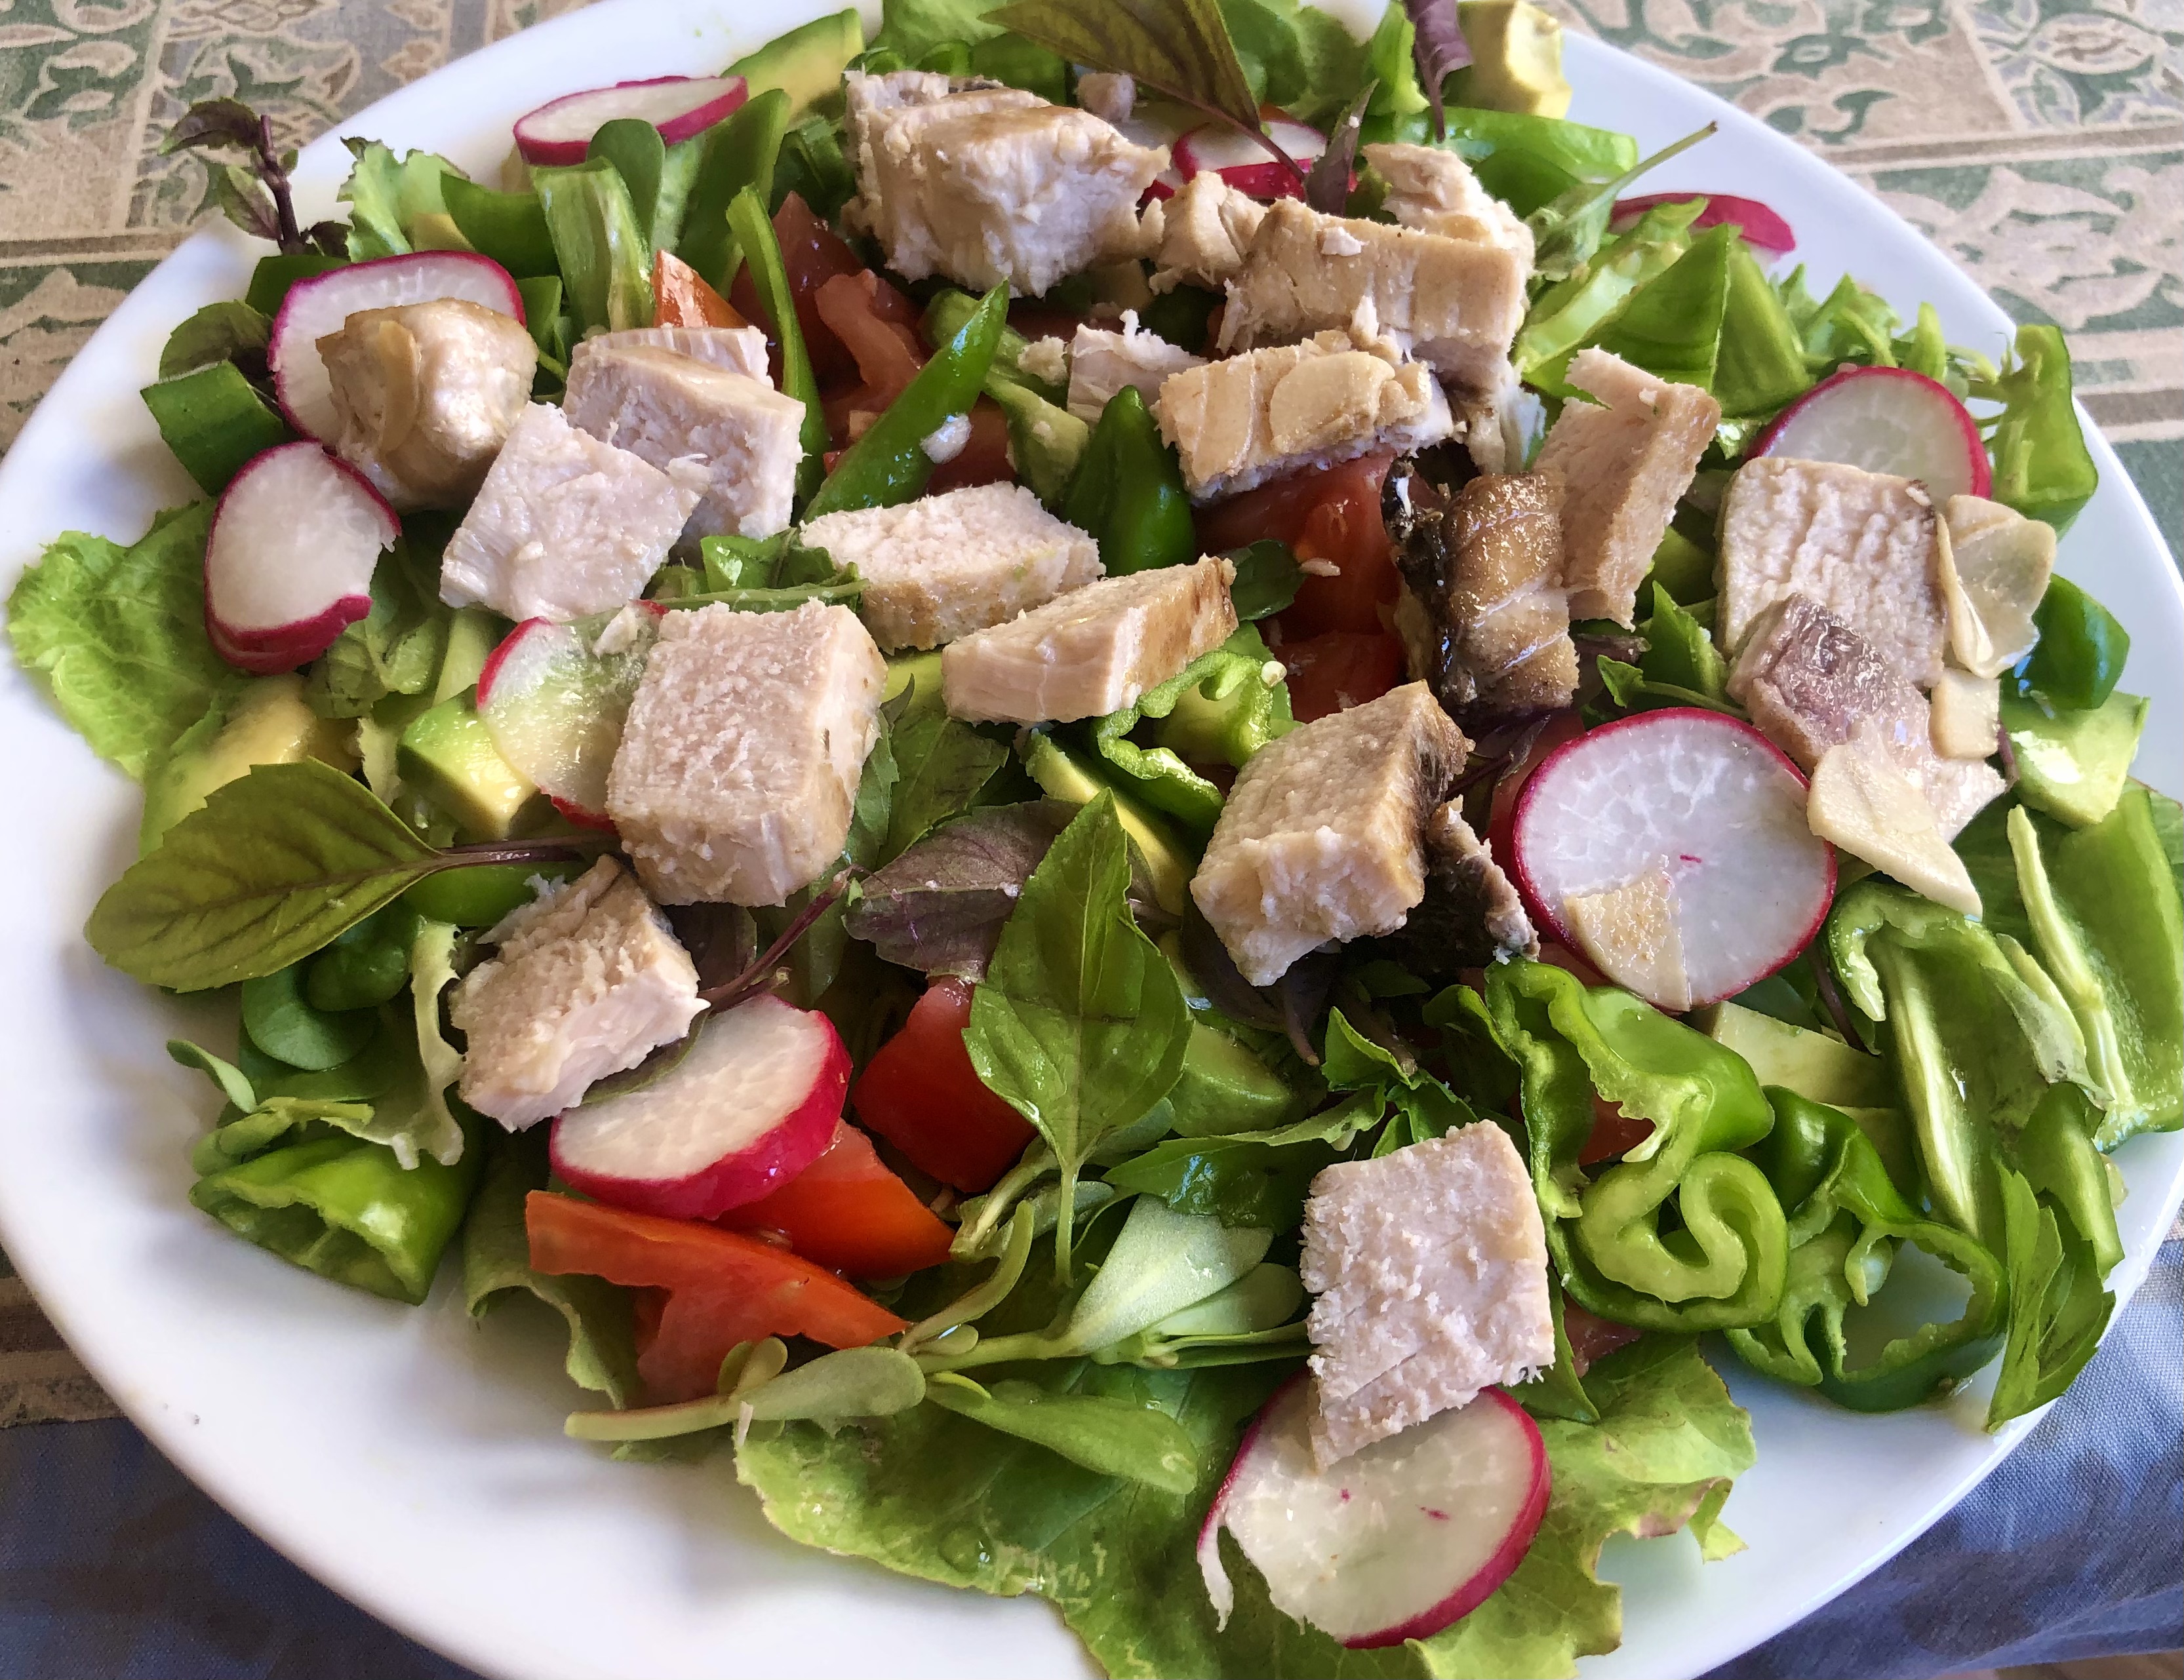
Once the cake is cool, it can cut into cubes, garnished with chopped fresh coriander and either enjoyed as it is with a fresh tomato relish, or rolled in desiccated coconut and toasted in the oven.

Share this:

  • Click to share on X (Opens in new window) X
  • Click to share on Facebook (Opens in new window) Facebook
  • Click to share on WhatsApp (Opens in new window) WhatsApp
  • Click to email a link to a friend (Opens in new window) Email
Like Loading...

Farinata

08 Wednesday Nov 2023

Posted by Nevenka in Food for One, Main Courses, Starters, Vegan, Vegetable Dishes, Vegetarian

≈ Leave a comment

Tags

Artichokes, besan, Chickpea flour, Cima Di Rapa, farinata, socca

or socca, torta di ceci or cecina is a thin savoury cake made from chickpea flour. This recipe originates in Italy, though due to the high nutritional quality and good flavour of chickpeas and their flour there are many recipes from many counties that use chickpea flour as their main ingredient. I’m going to give you a selection of these recipes in the next few posts.

This is a super easy and simple dish to make. A batter is made with chickpea flour and water, seasoned, poured into a shallow baking dish on top of smoking hot oil, topped with whichever flavouring you fancy and baked for ten minutes.
You can have your flavouring as simple as fresh herbs, rosemary is particularly good, or vegetables that are part cooked. In the photo below I sliced and fried fresh artichokes, the version above is spring onions and garlic with cima di rapa, a type of mustard green that has a lovely sweet and slightly bitter taste.

For 4 servings – cooked in a 36 centimetre diameter shallow pan

150 grams chickpea flour

450 ml water

4 tablespoons olive oil

salt and freshly ground black pepper

prepared topping for the farinata

Preheat the oven to 230c / 210c if a fan oven/ 450f /gas 8

Put the water into a bowl and slowly whisk in the sieved flour. Whisk to eliminate any lumps.

Put in a warm place for an hour or two when it should have bubbles on the surface.

Stir in 2 tablespoons of oil and season with salt and pepper

Put the other 2 tablespoons of oil in the pan and warm the pan in the oven until very hot and nearly smoking.

Take the pan out of the oven and quickly pour in the batter, arrange your topping evenly over the cake and put back in the oven for ten minutes until golden and crispy around the edges.

Serve straight away with a salad or two.

Share this:

  • Click to share on X (Opens in new window) X
  • Click to share on Facebook (Opens in new window) Facebook
  • Click to share on WhatsApp (Opens in new window) WhatsApp
  • Click to email a link to a friend (Opens in new window) Email
Like Loading...

Thai Fish Curry

24 Tuesday Oct 2023

Posted by Nevenka in Fish, Main Courses

≈ Leave a comment

Tags

curry, poton, squid, Thai

Poton, which I have used for this recipe, is from the family of cephalopods which include squid, cuttlefish and octopus. I’ve just discovered that there are over 800 types, many more than I expected! It’s an inexpensive fish to buy as it is a bit tougher and so needs longer slower cooking than squid which it resembles, so simmering it slowly in coconut milk flavoured with ginger, garlic and lemongrass suits it very well.


If you want to make this curry with more tender fish or the less tough squid, then make the sauce and simmer very slowly for half an hour before adding your fish, then continue simmering until the fish is just cooked.

For 2 portions

Thumb sized piece of fresh ginger

1 stalk lemongrass

1 large or 2 small cloves of garlic

1 green chilli

1 tablespoon green coriander seeds or a bunch of fresh coriander

500 grams poton or other fish

200 ml coconut milk

1 tablespoon Nam Pla fish sauce

salt and freshly ground black pepper


Slice the tender part of the lemongrass very finely.

Finely chop the garlic, chilli, ginger and coriander leaves. Crush the green coriander seeds if using those.

Put all the above in a wok reserving some coriander leaves for a garnish and add the coconut milk. Slowly bring to a simmer.

Add the sliced a poton, cover and simmer gently until the poton is tender, between 40 minutes and an hour depending on the toughness of the poton.

Season with Nam Pla fish sauce and garnish with more fresh coriander leaves.

Serve with stir fried vegetables and pickled radish.

Share this:

  • Click to share on X (Opens in new window) X
  • Click to share on Facebook (Opens in new window) Facebook
  • Click to share on WhatsApp (Opens in new window) WhatsApp
  • Click to email a link to a friend (Opens in new window) Email
Like Loading...

Turkey Meatballs & Chestnut Tagliatelle

18 Monday Sep 2023

Posted by Nevenka in Main Courses, Sauces, Techniques

≈ Leave a comment

Tags

Chestnut flour, chestnut pasta, fresh pasta, Meatballs, minced turkey, muchrooms, oyster mushrooms, Pasta

What to do with half a kilo of minced Turkey given to me by friends who were going away?

I haven’t made chestnut pasta for a good while, which would go very well with the mild gaminess of some little turkey meatballs, nor had I shared the recipe for chestnut pasta with you as I’d thought, so now is the opportunity to do that.
The meatballs don’t need a heavy sauce or a lot of sauce, so a mushroom sauce lightly thickened with goats cheese would be perfect.

Serves 4

The meatballs

500 grams lean minced turkey

1/2 sweet onion – finely chopped

1 large or 2 small cloves of garlic – finely chopped

1 level teaspoon fennel seeds

salt and freshly ground black pepper

olive oil for frying

The sauce

1/2 sweet onion – finely chopped

1 clove garlic – finely chopped

olive oil for frying

100 grams mushrooms – I used oyster mushrooms, but any type of mushroom will be fine – cut into small dice

500 ml chicken or vegetable stock

50 grams creamy goats cheese

salt and freshly ground black pepper

Parmesan cheese to grate on when serving

The pasta

65 grams chestnut flour

35 grams wholemeal spelt flour

1 large egg

pinch of salt

Start by making the pasta.

Mix the flours and salt in a bowl or on a board.

Make a well in the centre and add the lightly beaten egg.

Mix to make a firm but pliable dough. If it’s too dry add a little egg white and if too wet add extra spelt flour.

Using either a pasta rolling machine or a rolling pin, roll the pasta into an oblong, then fold into three, turn it 90 degrees and repeat the rolling and folding following the instructions in my post – the Beginners Guide to Making Fresh Pasta. Then roll the pasta down to the desired thickness, it was number 5 on my pasta machine, and cut into tagliatelle.
Leave to rest on your board while you make the meatballs.


Put the meatball ingredients in a bowl and mix well squeezing the onion and garlic into the minced turkey.


Taking a small spoonful at a time, form the meat mix into balls about the size of a cherry, rolling them between your palms to push the meat into firm balls and lay them out on two trays. If you have lean meat the meatballs will hold together without the need for eggs or breadcrumbs, and you will have a lighter texture to the meatballs. It does mean that the balls are a little more delicate and one has to take care when turning them in the initial cooking.

Once you have all the meatballs ready heat some olive oil in a large frying pan and put in half the meatballs. When they are nicely browned on one side, gently turn them. Keep doing this until they are browned and sealed on all sides.
Remove the meatballs from the pan , and put into a dish on the side.

Add a little more oil to the pan and cook the other half of the meatballs in the same way. Remove these from the pan as well.

Add a little more oil to the pan and put in the onions and garlic for the sauce. Fry for a few minutes .

Add the mushrooms, stir to mix and fry to lightly brown them.

Add the stock and heat until the stock is boiling then add the meatballs, turn the heat down to a simmer and leave to cook through for about 7-10 minutes.

Meanwhile bring a pan of salted water to the boil and a cook the pasta for 5-7 minutes. Drain

Cut the goats cheese into small pieces and add to the meatballs to slightly thicken the sauce.

Check the seasoning adding salt and freshly ground black pepper as needed.

Serve the tagliatelle with the meatballs spooned over and grated Parmesan cheese.

Enjoy ❤️

Share this:

  • Click to share on X (Opens in new window) X
  • Click to share on Facebook (Opens in new window) Facebook
  • Click to share on WhatsApp (Opens in new window) WhatsApp
  • Click to email a link to a friend (Opens in new window) Email
Like Loading...

Lime Ice Cream

21 Monday Aug 2023

Posted by Nevenka in Sweet Things, Vegetarian

≈ Leave a comment

Tags

Condensed milk, Cream, Ice Cream, lime sherbert, Limes

Cool and sharp and rich. This ice cream satisfies on all requirements, as well as only having three ingredients and not needing an ice cream making machine. If you plan to make ice cream at home the only equipment I recommend buying if you don’t have them, are a couple of small metal loaf tins. Ice cream will freeze much faster in metal than plastic, and the smoothness of ice creams and sorbets relies on it freezing into very small crystals, which means you either have to freeze your mixture very fast or keep it moving to stop large crystals forming – or both.


My little tins measure 8 x 13 centimetres and are 5 centimetres deep. This recipe will make two tins full. Put the tins in the freezer to be chilling down before you start the recipe.

This amount makes 8 – 12 portions depending on how generous you would like them to be.

Juice and zest of 175 grams unwaxed limes

400 grams condensed milk

350 ml fresh thick cream

Measure the condensed milk into a bowl and then grate in the zest from the limes.

Juice the limes and add this to the condensed milk. Stir thoroughly. This will make the milk thicken.

In another bowl beat the cream until thick.

Fold the cream into the lime mix.
Spoon into chilled containers lined with cling film and freeze in the coolest part of your freezer.

Enjoy with a little lime sherbert sprinkled over. There is a recipe for the sherbert on this blog, just put the name in the search box.

Share this:

  • Click to share on X (Opens in new window) X
  • Click to share on Facebook (Opens in new window) Facebook
  • Click to share on WhatsApp (Opens in new window) WhatsApp
  • Click to email a link to a friend (Opens in new window) Email
Like Loading...

Rye & Spelt Soda Bread

03 Thursday Aug 2023

Posted by Nevenka in Techniques

≈ Leave a comment

Tags

bread, rye, soda bread, spelt

Soda bread is one of the easiest and quickest breads to make, and when using whole meal spelt and rye flour makes a light and moist loaf. This recipe is for the basic loaf but feel free to add little extras to it, caraway, pumpkin or sunflower seeds, nuts, sun dried tomatoes…..

For the liquid I like to use the water from feta or mozzarella which I save as I use the cheese by freezing it. You can use milk too. Vegans will want to use either water or vegetable stock.

Just in case you think I’ve forgotten to mention salt, I haven’t, adding it seems to inhibit the rising of the loaf plus the bicarbonate of soda adds a certain saltiness.

125 grams whole meal spelt flour

125 grams whole meal rye flour

1 level teaspoon bicarbonate of soda

2 teaspoons lemon juice

180 ml liquid – either vegetable stock, chicken stock or liquid from either mozzarella or feta cheese, or milk

Put all the dry ingredients in a bowl and mix thoroughly. Make a well in the centre.

Add the lemon juice to the measured liquid that you are using and stir to mix in. Pour into the well in the flour.

Using either a dough hook on a mixer or a spoon, mix to a fairly wet dough. It will be quite sticky.

Sprinkle on a little more flour to enable you to lightly form the dough into a ball.

Put onto a tray lined with baking parchment and make a cross into the ball using the side of your hand.

Bake in an oven preheated to 160C fan, 180C, 350F or gas mark 4 for 40 minutes until golden.

Cool on a rack and enjoy!


Share this:

  • Click to share on X (Opens in new window) X
  • Click to share on Facebook (Opens in new window) Facebook
  • Click to share on WhatsApp (Opens in new window) WhatsApp
  • Click to email a link to a friend (Opens in new window) Email
Like Loading...

Aubergine & Purslane Salad with Figs & Yoghurt Dressing

30 Sunday Jul 2023

Posted by Nevenka in salads, Vegan, Vegetable Dishes

≈ Leave a comment

Tags

Aubergine, Figs, Purslane, Salad, Vegan, Vegetarian, yoghurt

Here’s the recipe for the final dish of my Turkish lunch. For those of you not familiar with Purslane or Verdolaga as it is called here in Spain and have vegetable gardens, it is a salad plant that is well worth cultivating as it is succulent even in the hottest months. You only have to sow it once and let it go to seed, then it will appear every summer.

In Turkey a particularly large leafed variety has been developed, and its leaves are regularly made into a salad with just goats milk yoghurt and salt. If you can’t get hold of Purslane, then substitute Corn Salad (Canónigos), or Watercress.

For 4 portions

1 large black aubergine

purslane or corn salad

2 large black figs – diced

2 tablespoons finely diced sweet onions

juice of 1/2 lemon

sea salt

2 -3 tablespoons goats yoghurt or vegan yoghurt

Either roast or microwave the aubergine until soft. If you have never cooked an aubergine in the microwave, it is a good fast way to get soft creamy flesh. Prick the aubergine all over with a fork to prevent it bursting while cooking. Cook on a high setting for a couple of minutes, then turn and cook for a couple more minutes. Keep doing this until you can feel that it is soft all the way through.

Leave the aubergine to cool, then cut it into quarters lengthways, remove the flesh discarding the skins and dice the flesh.

Put the flesh in a large salad bowl with the rest of the ingredients and mix well.

Check the seasoning and serve.

Share this:

  • Click to share on X (Opens in new window) X
  • Click to share on Facebook (Opens in new window) Facebook
  • Click to share on WhatsApp (Opens in new window) WhatsApp
  • Click to email a link to a friend (Opens in new window) Email
Like Loading...

Bulgur Wheat Salad

29 Saturday Jul 2023

Posted by Nevenka in salads, Vegan, Vegetable Dishes

≈ Leave a comment

Tags

basil, Bulgur wheat, cucumber, pomegranate molasses, Salad, tomatoes, turkish

As promised the recipe for the bulgur wheat salad that was part of my Turkish lunch.

Makes 4 generous portions

150 grams bulgur wheat

80 ml boiling water

200 grams grated soft tomato flesh

1 tomato – cut into small cubes

1/2 cucumber – peeled and cut into small cubes

2 tablespoons finely chopped spring onions

1 tablespoon pomegranate molasses

1 tablespoon extra virgin olive oil

fresh green chilli – finely chopped – to taste

salt and freshly ground black pepper

sprigs of fresh basil roughly chopped

black olives to garnish

Start to prepare the salad a couple of hours before you plan to eat.

Put the wheat in a large bowl and pour over the boiling water. Stir to mix well and leave to soak for five minutes.

Next grate in the tomato. I had a nice big beef tomato that had gone soft and watery. Cut the tomato in half across its equator and the grate the flesh side on a coarse grater, seeds included, until you are left with just the skin in your hand. Bin the skin.

Mix the tomato into the wheat and leave to steep for 20 minutes.

Add the rest of the ingredients except the olives and basil and mix well.

Leave to steep until you are ready to serve.

Put the salad in your serving dish and decorate with olives and basil. Enjoy 😊

Share this:

  • Click to share on X (Opens in new window) X
  • Click to share on Facebook (Opens in new window) Facebook
  • Click to share on WhatsApp (Opens in new window) WhatsApp
  • Click to email a link to a friend (Opens in new window) Email
Like Loading...

Beef Kofta & a simple Turkish Summer Lunch

28 Friday Jul 2023

Posted by Nevenka in Main Courses

≈ 4 Comments

Tags

Beef, kofta, turkish

It’s hot and humid down here in southern Spain, the manual jobs around the land are on hold, so it’s a good time for me to go through the culinary and travel diaries that I have jotted things down in over the years and create dishes that I have described. The first notebook I picked up has in it notes I made on a visit to Istanbul, including the food we ate and saw being eaten, this inspired me to have a Turkish theme to the lunch I was preparing for friends today.

Quite a lot of Turkish dishes are familiar to me as my father was from Sarajevo which was under Turkish rule for over 500 years, so his recipes passed down from his mother and taught to me and my siblings, were very much influenced by Turkish cuisine.


On my menu there was Beef Kofta, Bulgur Wheat Salad, Aubergine Salad with Yoghurt Dressing and Muhammara Red Pepper and Walnut Pate. The pate recipe I gave you in a previous post, so just search ‘red peppers’ to find it. Today I’ll give you the recipe for the Kofta as my grandmother Sofia would have made it, the salads will be in the next post.

BEEF KOFTA RECIPE

Before you start a couple of pointers, using lean mince means that the kofta will stick together when you cook them, so you won’t need to add an egg and breadcrumbs as suggested by some recipes, which I think makes the kofta less juicy. Also finely chopping the onion by hand rather than in a food processor, although a bit of work, will give the kofta a better texture too.

500 grams lean minced beef

1 medium onion – cut into small dice

3 cloves of garlic – finely chopped

1/2 teaspoon cumin seeds

1 teaspoon allspice berries

1 teaspoon black peppercorns

cinnamon quills – broken into pieces – roughly a teaspoons worth

1/2 teaspoon sumac

1/2 teaspoon salt

Put the mince in a large bowl with the onions and garlic and mix together with your hands.

Put the cumin seeds, allspice berries, peppercorns and cinnamon pieces in a heavy based frying pan on a low heat to toast. Shake the pan from time to time so that the spices are warmed on all sides. When you can smell their warm fragrance coming out of the pan, turn off the heat and leave to cool.

Once your spices are cool grind them to a powder either in a mortar with a pestle or in a little coffee grinder as I do.

Add to the mince mix together with the salt and sumac and work the spices evenly into the meat squeezing and mixing with your hands.

Form the meat into little flattened cakes on a floured plate, turning them so that they are evenly covered in flour.

Fry in olive oil on a medium heat until nicely browned, then turn over to cook the other side adding more oil as needed.

Share this:

  • Click to share on X (Opens in new window) X
  • Click to share on Facebook (Opens in new window) Facebook
  • Click to share on WhatsApp (Opens in new window) WhatsApp
  • Click to email a link to a friend (Opens in new window) Email
Like Loading...

Marinated Bonito & Mixed Salad

18 Tuesday Jul 2023

Posted by Nevenka in Fish, Food for One, Main Courses, salads, Starters

≈ Leave a comment

Bonito is a medium sized fish related to tuna and mackerel which is in season in the Mediterranean Sea at this time of the year, so very reasonably priced. I bought a couple of thick steaks yesterday. I like to remove the skin and the little bones that divide the north, south, east and west of the steaks, so that I am left with four mini steaks from each slice of bonito. Two of these make a generous portion per person, so of my eight steaks, four went straight into the freezer, and four I cooked at lunchtime.

I fried them in olive oil together with two thinly sliced garlic cloves and had two of them for lunch with grilled vegetables. The other two I let cool and put in a small dish with the cooking juices of oil and garlic, then I put in enough white wine vinegar to come about half way up the fish. I covered the dish and left the fish to marinate in the fridge. Last night I turned the steaks over to ensure that the pickle was penetrating the fish all the way round.

So today I cut up the steaks and served them on a bed of salad using the marinade as a dressing.

The salad consists of a layer of lettuce and purslane from the vegetable garden, roughly diced tomatoes, avocado slices, the first padrón peppers and okra this season in the garden, thinly sliced radish and purple basil leaves. Yummy!

Share this:

  • Click to share on X (Opens in new window) X
  • Click to share on Facebook (Opens in new window) Facebook
  • Click to share on WhatsApp (Opens in new window) WhatsApp
  • Click to email a link to a friend (Opens in new window) Email
Like Loading...
← Older posts
Newer posts →

Create a free website or blog at WordPress.com.

Privacy & Cookies: This site uses cookies. By continuing to use this website, you agree to their use.
To find out more, including how to control cookies, see here: Cookie Policy
  • Subscribe Subscribed
    • fincafood
    • Join 103 other subscribers
    • Already have a WordPress.com account? Log in now.
    • fincafood
    • Subscribe Subscribed
    • Sign up
    • Log in
    • Report this content
    • View site in Reader
    • Manage subscriptions
    • Collapse this bar
 

Loading Comments...
 

    %d