• About
  • La Micaela Farm Shop

fincafood

~ culinary and horticultural life on a Spanish farm

Category Archives: Vegetable Dishes

Yuca Dumplings

19 Tuesday Feb 2013

Posted by Nevenka in Techniques, Vegetable Dishes

≈ Leave a comment

Tags

Cassava, Fish Stew, Manioc, Yuca

Following on the theme of Ultramarinos – things from far away across the sea – I thought you would like the recipe for these little dumplings made from Yuca root. IMG_0027

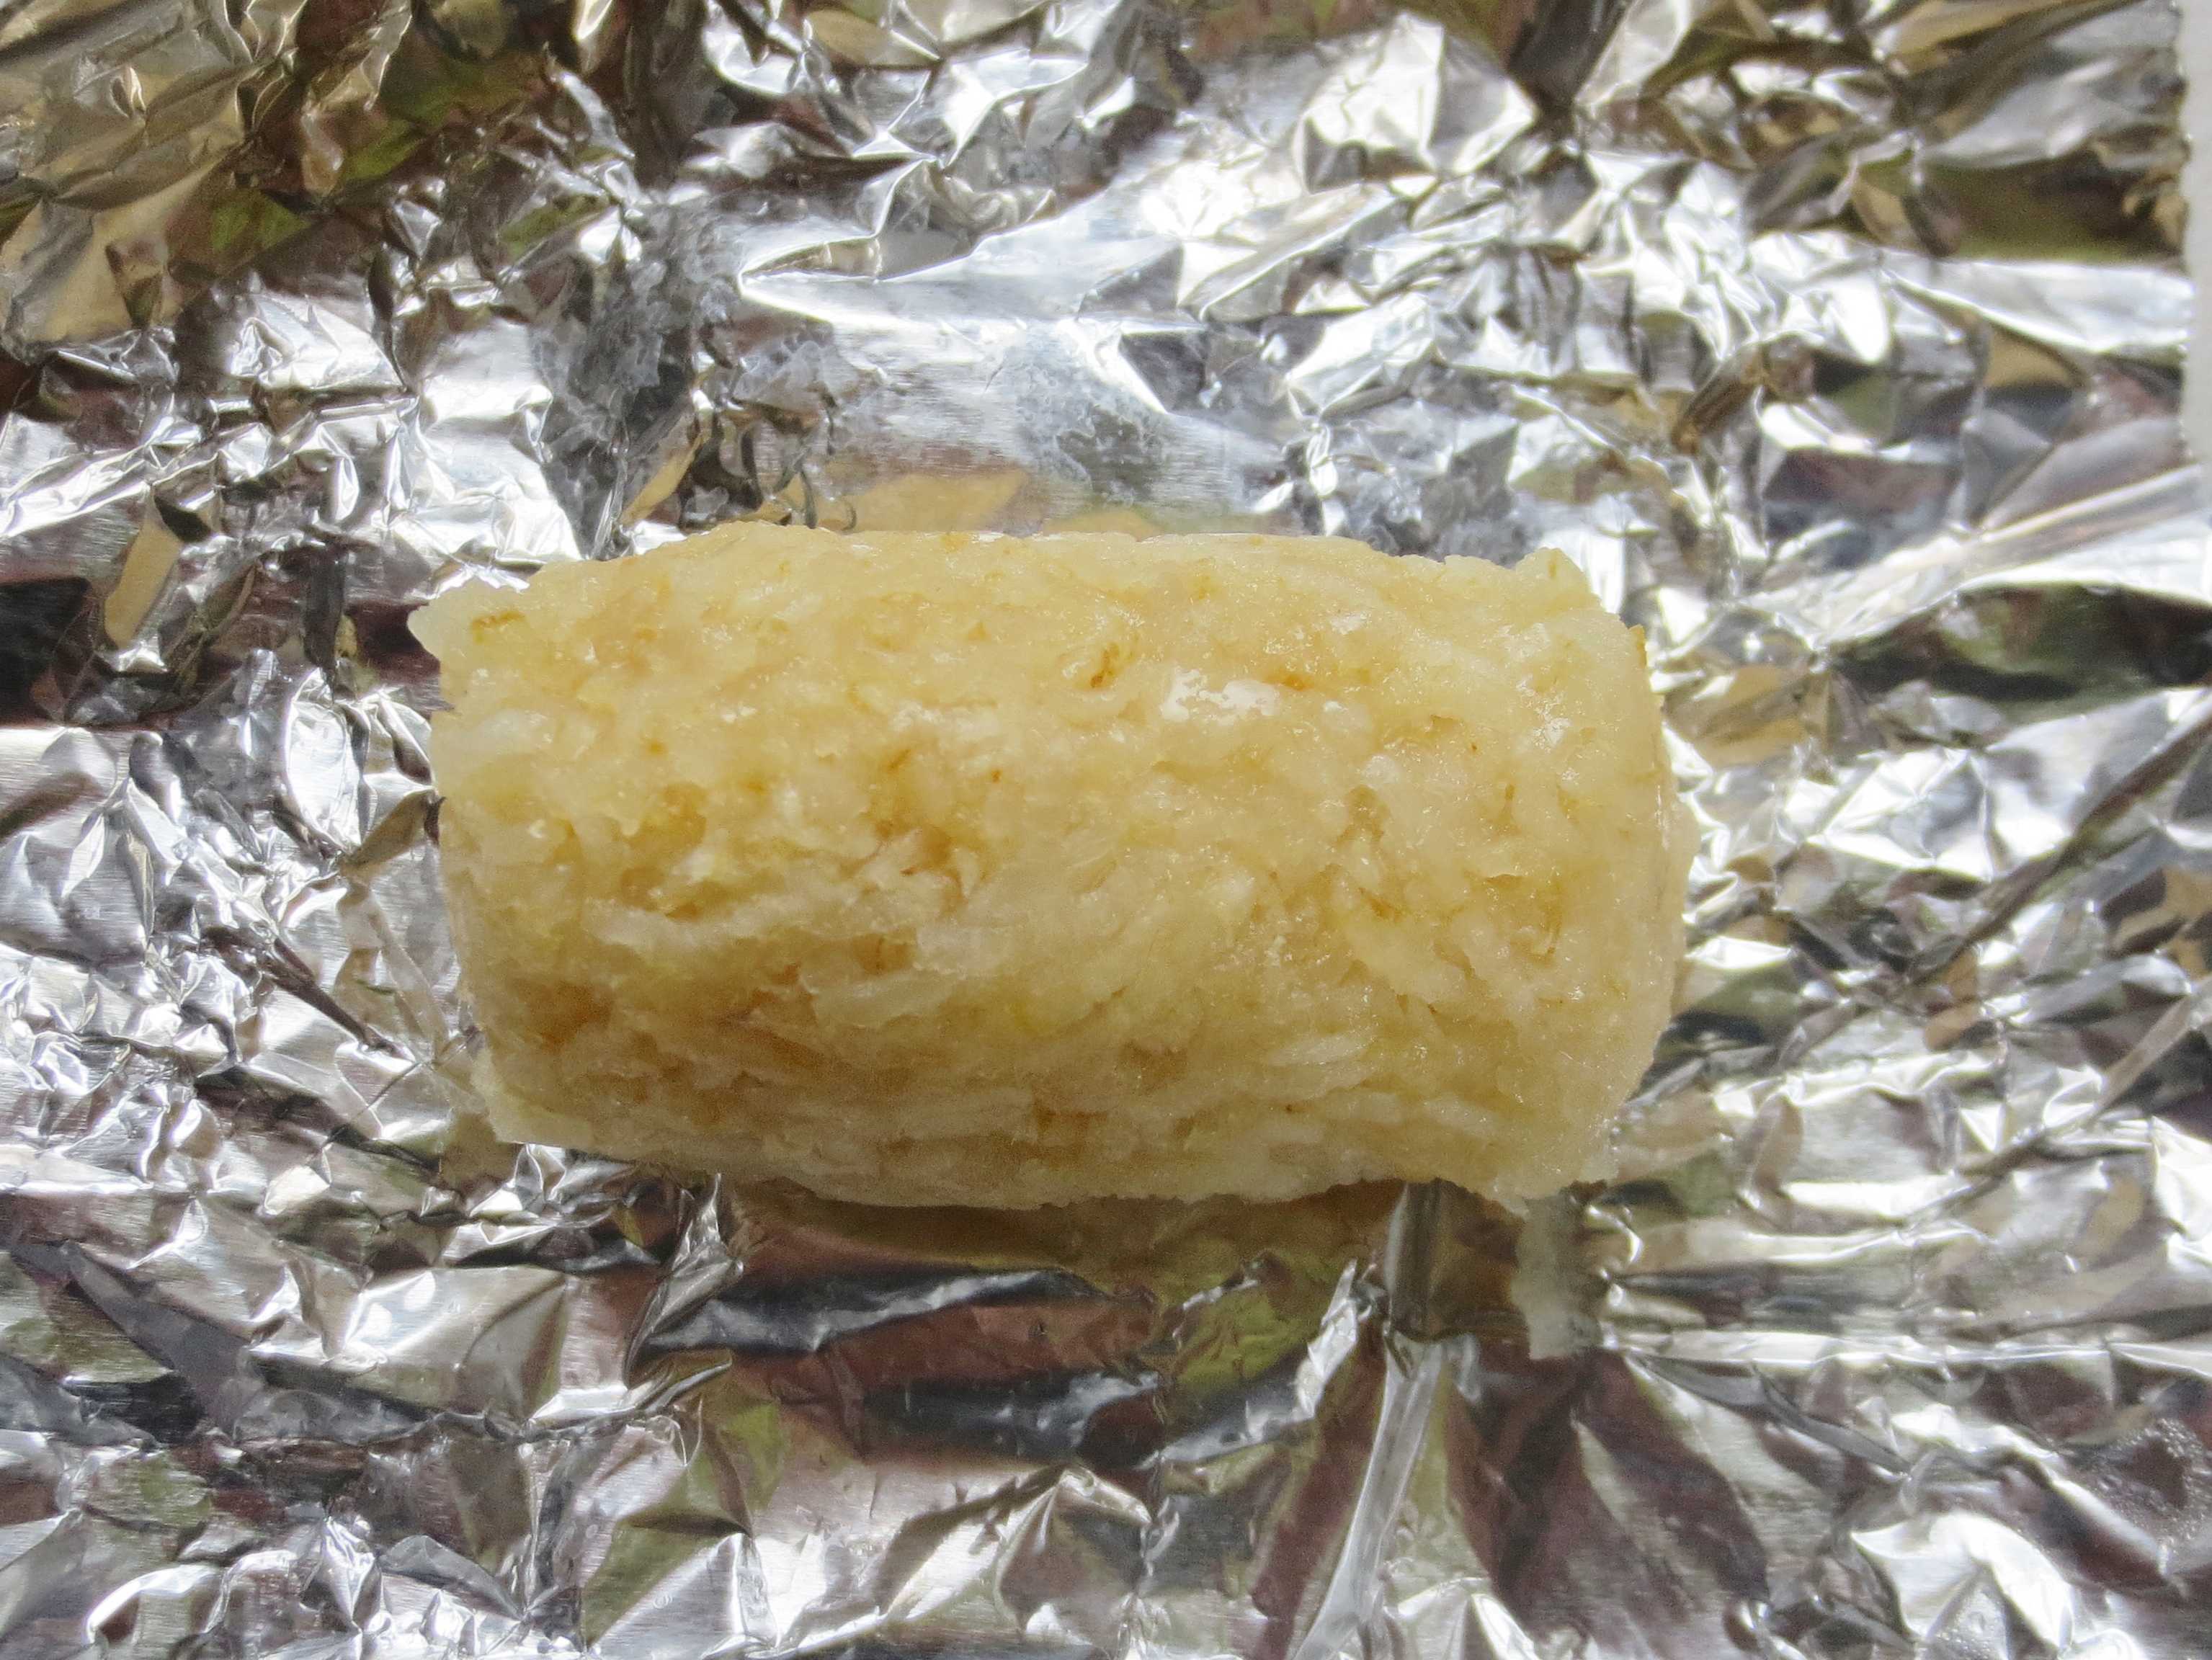
Manihot Esculenta – Yuca, Cassava, Manioc, Mogo started to appear on the markets here about ten years ago with the arrival of Equadorians and Bolivians who came to work in Spain. It has been cultivated in Peru for more than 4,000 years and is more of a staple in South America than potatoes. Nowadays it is also grown extensively in Africa and Asia. It can be simply boiled and mashed, cut into fat fingers and fried like chips, or dried and ground into flours of various levels of fineness for making from cous cous style grains to sweet cakes.IMG_0017

The tapioca of school dinner infamy is made from Yuca – but don’t let that put you off from trying it in a different form. The chips I have to say I found dry and a bit hard, but do try them. The dumplings I love.  They have a firm slightly glutinous texture and a bit of sweetness. I love them with spicy curries instead of rice, with sweet and sour sauce as a vegetarian dish, and in soups, again because of the slight sweetness they fit better with a spicy soup.IMG_0019

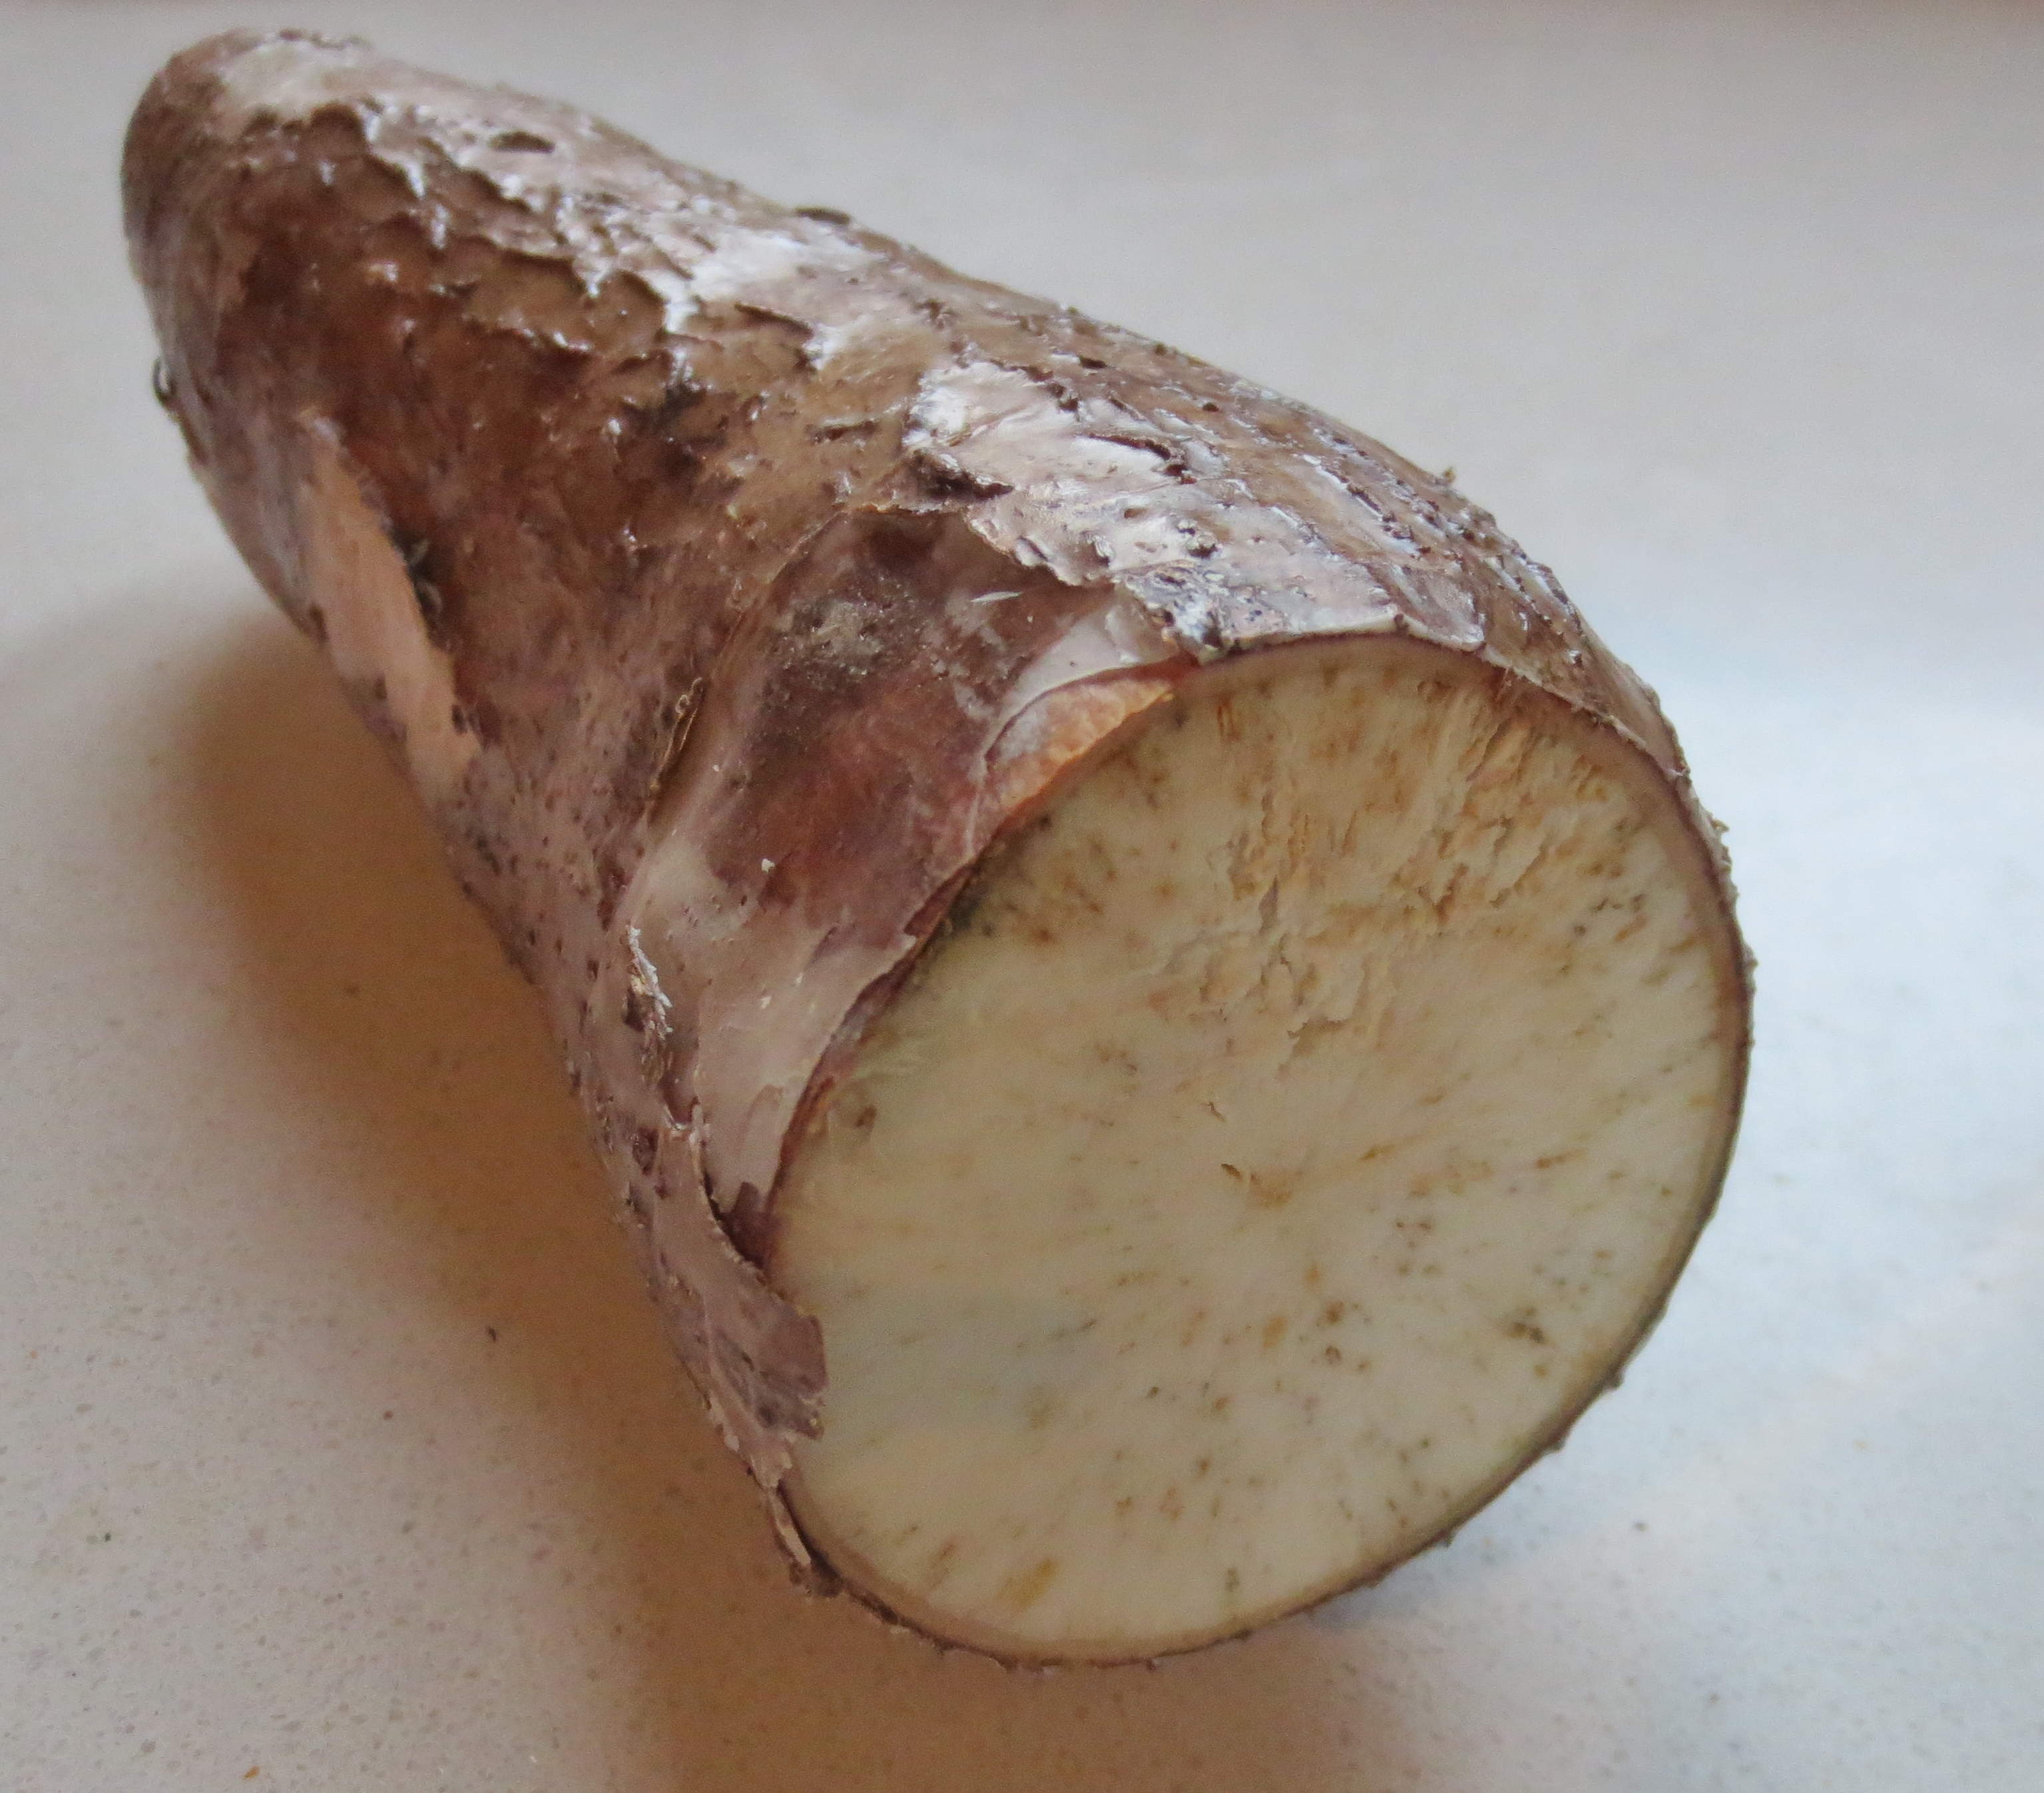
I have totally forgotten where I came across this recipe, I am constantly collecting recipes and food ideas from magazines and newspapers, so it may well have come into my life that way, the original bit of paper now long lost but the method firmly locked into my memory.

Top and tail the yuca root and then peel it with a potato peeler. Wash it and then grate finely. This is easier done with a food processor.

There may be a thick fibrous thread in the centre of the root, discard this.IMG_0020

Take a handful of the grated root and squeeze it into a small cylinder. This may seem difficult at first, but with pressure and turning it in your hand the pulp will start to stick together.

Put the dumpling on a small square of tin foil and wrap it into a parcel. If you wanted to be truly authentic, then I suppose a banana leaf would be a better wrapper.

Do this with all the pulp.IMG_0025

Steam for 45 minutes. Let cool in the steamer.

Once they are cool enough to handle they can be unwrapped and used.

Any surplus dumplings will freeze well. I recommend taking them out of the tin foil to freeze them as the foil disintegrates in the freezer and leaves bits on the dumplings which is not very nice. You can tell that I am speaking from hard experience here.

Next post the Spicy Fish Stew with Yuca Dumplings illustrated below to whet your appetite.

IMG_0030

Share this:

  • Share on X (Opens in new window) X
  • Share on Facebook (Opens in new window) Facebook
  • Share on WhatsApp (Opens in new window) WhatsApp
  • Email a link to a friend (Opens in new window) Email
Like Loading...

Praising Braising

16 Wednesday Jan 2013

Posted by Nevenka in Vegetable Dishes

≈ 1 Comment

As a grower of organic vegetables, i like to maximise the fabulous flavour that they have, and for me this means cooking them with little or no water. Griddling and grilling are both good ways of doing this. The vegetables can be just brushed with good olive oil and sprinkled with seasoning, or marinated with garlic and herbs before the cooking.

IMG_3592Another method of keeping all the flavour in the vegetables is to braise them either in their own moisture, or with the addition of a little water, wine, stock or vinegar that is then reduced down to nothing in the cooking. Other flavours can be added to bring out the best in the vegetable.

The beetroot pictured above was cooked with balsamic vinegar.

For four people, take half a kilo of beetroots, peel the and cut them into bite sized pieces.

Put them in a saucepan that has a lid, into which the cubes of beetroot fit in one layer. Add two tablespoons of good olive oil. cover with the lid and put on the heat.

Cook for a few minutes shaking from time to time to cover the beetroot pieces in oil.

Take a whole bulb of garlic and break it into cloves Leaving the skin on the cloves.With a sharp knife cut half way across each clove. Add these to the pan with two tablespoons of balsamic vinegar and some fnely chopped oregano. Season with sea salt and lots of coarsely ground black pepper.

Cover and cooking over a low heat until beetroot is cooked to your preferred softness.i like mine still with some bite, and that takes about twenty minutes or so. By then the balsamic vinegar will have reduced down to a tasty sticky glaze.

The Cima Di Rapa, pictured below in the vegetable garden is one of the highlights of the autumn and winter season at La Micaela. The flower heads are eaten like the purple sprouting Brocolli so beloved in England, but it is ready earlier in the season. From November to February roughly in the climate here in southern Spain, depending on the temperature. The flavour is a little sharper than brocolli and is complemented by either salty anchovies or in this instance bacon. Broccoli of course can be prepared in exactly the same way.

IMG_3584Cut some streaky bacon into thin lardons and fry these in olive oil.

Add florets of Cima or broccoli. Toss with thee bacon and olive oil.

Season with salt, not too much if the bacon is salty, and freshly ground black pepper.

Cover and cook on a low heat until the florets are cooked.

if the Cima or broccoli florets are tough, then add half a centimetre of water to the pan at the beginning of cooking and cook until it evaporates.

Try cooking shredded cabbage like this. Sprouts work too, although they need a  little water adding, enough to go about half way up the sprouts. Cook covered on a more brisk heat until the water has reduced down to almost nothing and they should be cooked through but still retain some bite.

IMG_3570To cook pumpkin, or butternut squash, simply cut into bite sized pieces and cook covered, in butter with seasonings. If you are going on to make pumpkin ravioli, this is an ideal way to cook the pumpkin.

Carrots, Swedes and courgettes are very tasty cooked slice this.

IMG_3590

Share this:

  • Share on X (Opens in new window) X
  • Share on Facebook (Opens in new window) Facebook
  • Share on WhatsApp (Opens in new window) WhatsApp
  • Email a link to a friend (Opens in new window) Email
Like Loading...

Oranges Are Not Only Fruit……….

15 Thursday Nov 2012

Posted by Nevenka in Starters, Vegetable Dishes

≈ 1 Comment

orangesAll the citrus fruits are ripening early this year. Normally the limes are just starting to crop now, but have been ready for almost two months now. The one little grapefruit tree is so laden with large fruit that I will have to make some props for the branches to stop them breaking. As the fruit is already changing from green to yellow I thought I would check to see if they were sweet enough to eat so that I could thin out the biggest groups of fruit. On one side of the tree the fruit look pinker than the other, but the fruit are still tart, while the other side of the tree has yellower fruit that are edibly sweet.

There are several varieties of oranges on the farm, the earliest of which normally start being ready to eat at Christmas, but this year they are nearly there already. While still a little tart for eating alone, they are perfect for salads.

The use of fruit in savoury dishes is a vestige of the arab occupation of various countries around the mediterranean. While in Sicily recently I was treated to a one day course on Sicilian cooking and our profesora, Silvia, prepared for a starter a salad of Florence Fennel with Oranges. (There will be more of the cookery course in a later post.)salad_fennel_orange

Slivers of fresh plump Florence Fennel steeped in lashings of fresh olive oil from their farm, seasoned with salt and freshly ground black pepper, topped with sliced oranges and garnished with black olives.

The sweet and sour flavour of nearly ripe oranges and the fruity acidity of the new freshly pressed olive oil go together so well. One of the simplest orange salads that I have been served was in Merida while on honeymoon. Oranges lightly salted and soaked in olive oil for an hour or two, then garnished with tiny black currants. It was served as an amuse bouche.

Whenever I have been away on a trip, particulary if to somewhere landlocked, the food I yearn for on my return is the wonderfully fresh fish that we have here. Dorada or Sea Bream is farmed in large round enclosures just off the coast here. They are brought to market when the fish are a perfect one person size and are always brightly fresh. Some purists insist that line caught wild fish taste better, but I defy anyone to tell the difference in a blind tasting. Also freshness is such a factor with the taste of fish that I would rather have super fresh farmed than day old wild.Sea_bream_orange_salad

With my Dorada this week I made a salad of oranges, yellow plum tomatoes, fennel fronds, crunchy lettuce leaves and toasted hazel nuts, all dressed with some of the Sicilian olive oil.orange_carrot_salad

Now for the truly Arab version of an orange salad. Finely grated carrot dressed with lemon juice, honey and orange flowerwater, spread over a layer of thinly sliced oranges and garnished with a few toasted cumin seeds. Leave in the fridge to let the flavours mix for an hour before serving with a spicy lamb tagine.

Share this:

  • Share on X (Opens in new window) X
  • Share on Facebook (Opens in new window) Facebook
  • Share on WhatsApp (Opens in new window) WhatsApp
  • Email a link to a friend (Opens in new window) Email
Like Loading...

Golden Risotto

14 Friday Sep 2012

Posted by Nevenka in Food for One, Main Courses, Starters, Vegetable Dishes

≈ Leave a comment

Another busy day, and so another quick lunch, but that does not mean that lunch has to be dull and unexciting. The self sown fig tree is still giving four or five sweet little irresistible black figs every day so I shall have those with some smoked duck breast while a risotto is cooking.

I thought that I was going to make a courgette risotto, but when I went to pick a couple I was diverted by the sight of tiny yellow plum tomatoes and thought that combined with some pumpkin they could make a cheery golden risotto. The hazel nuts added at the end give a crunch that contrasts nicely with the soft risotto.

Per person

1 small onion – finely chopped

120 grams pumpkin – cut into small cubes

120 grams yellow plum tomatoes – halved

40 grams risotto rice

Chicken stock

Oil for frying or half oil and half butter if you prefer the flavour.

Salt and freshly ground black pepper

30 grams grated parmesan cheese

Roasted hazel nuts – 30 grams golden risotto

Heat a tablespoon of olive oil in a shallow pan and add the onions. Fry gently until translucent.

Add the pumpkin cubes and stir to mix in. Fry for five minutes stirring from time to time.

Add the rice and stir to coat in the oil and pumpkin juices. Cook until the rice looks slightly translucent.

Add the tomatoes and some stock and stir. Season with salt and pepper. Cover and continue cooking on a gentle heat, adding more stock as necessary until the rice is cooked.

Stir in most of the cheese reserving a small amount to sprinkle on the risotto when you serve it.

Add the hazel nuts and cook long enough to warm them through.

Serve sprinkled with the remaining cheese.

Share this:

  • Share on X (Opens in new window) X
  • Share on Facebook (Opens in new window) Facebook
  • Share on WhatsApp (Opens in new window) WhatsApp
  • Email a link to a friend (Opens in new window) Email
Like Loading...

Ensalada Murciana

09 Thursday Aug 2012

Posted by Nevenka in Food for One, Snacks and Tapas, Vegetable Dishes

≈ Leave a comment

This is one of those wonderfully successful recipes that have been created by a problem. In the hot summers of southern Spain, the skins of vegetable fruits become very tough and unpalatable, so skinning them for salads is essential.  So a salad was created that consisted of skinned tomatoes and red peppers, garlic, olive oil, fresh oregano and salt. The the sum of the parts becoming greater than the individual items.ensalada_murciana

The ideal is to char the skin of your vegetables over an open fire or barbeque so that you get a subtle smokey flavour to the salad. It is just the thing to do on that barbeque fire that is now at its peak, now that you have finished cooking the meal. But to do that requires planning ahead and having the tomatoes and peppers already in the house.

Life is not always ideal so in the event that you don’t have a fire available, then  the tomatoes and peppers can be held over a gas flame turning them slowly until the skins blacken all over. The skin on the tomatoes will split when cooked enough to peel. The red peppers need to be really quite black before they will peel easily. It is almost impossible to have them too black. Put the peppers to cool in a covered plastic container to help retain the moisture in the fruit.skinning_tomatoes

Peel the vegetables as soon as they are cool enough to handle retaining any juice that comes out of the peppers.

Cut into bite sized pieces and put in a dish with the pepper juice.

Very finely chop a clove of garlic and add to the salad.

Season with salt, a generous amount of extra virgin olive oil and plenty of chopped fresh oregano.

Leave – not in the fridge – for about an hour for the flavours to meld before serving.

Share this:

  • Share on X (Opens in new window) X
  • Share on Facebook (Opens in new window) Facebook
  • Share on WhatsApp (Opens in new window) WhatsApp
  • Email a link to a friend (Opens in new window) Email
Like Loading...

Preserved Salads

04 Monday Jun 2012

Posted by Nevenka in Preserves, Techniques, Vegetable Dishes

≈ Leave a comment

red_pepper_salad

Red Pepper Salad

Waste is one of the biggest crimes of modern times, and particularly food waste. When you have gone to all the trouble of digging, manuring, digging again, then sowing and watering your own vegetables, and nurturing them into maturity, then the last thing you want to do is waste any of them.

No matter how well you plan to grow the amounts of produce that you actually need, there will always be moments when there are surpluses. This method of preserving deals very well with small surpluses. When I started developing these recipes I had an idea in my head of the use I wanted for the resulting preserve. I wanted cooked vegetables that I could use as either salads as part of a mixed starter, or as the topping for crostini or pizzas, or as the base for a pasta sauce. I love those cooked vegetable salads that the Italians serve as part of antipasti. They are cooked al dente retaining a bit of firmness, and are well flavoured with lemon juice, garlic, olive oil and often herbs. Once you get your head around the basic principles of this preservation method and the flavouring you will be able to make your own combinations of ingredients.

Essential equipment for these recipes are jars. I find that as these salads are quite rich containing a large proportion of olive oil I don’t want to use a large amount at once, so save any small jars that come into the house. They need to have a screw top and plastic seal as so many modern jars do. They need to be scrupulously clean and then need sterilizing in a water bath just before use. Don’t be put off by the terminology, they just need to be put in a pan of boiling water with their lids and held there for five minutes.

I am going to start with Aubergine and Red Pepper Salad as this is one of the ingredients that I used in making Mini Chicken Pstilla which is the recipe that I was going to share with you today until I realised that it would be better to give you the salad first. The Pstilla recipe will follow I promise.

AUBERGINE AND RED PEPPER SALADaubergine_and _red_pepper_salad

4 aubergines

4 red peppers

6 large cloves of sweet garlic

300 ml olive oil

large sprig of fresh oregano

lemon juice

sea salt and freshly ground black pepper

Peel and coarsely chop the garlic.

Cut the red pepper into small dice.

Get the pan with the jars and lids on to warm. If you haven’t a pan big enough to take them all, start with as many jars as the pan will take and then you can add more once these are used. Don’t worry if they are ready too soon for the salad, you can always turn off the heat for a while and then reboil when needed.

In a pan large enough to take all the ingredients heat the olive oil slowly on a low heat. When it is warm add the garlic and peppers. Stir to cover with oil.

Cut the aubergines into dice about a centimetre square. Add to the pan. You don’t want to cut the aubergines in advance as they have a tendency to discolour and go brown. Stir to mix in.

Season with a good couple of pinches of salt and the chopped oregano leaves and stir again. Cook slowly for about ten minutes.

We are now getting to the tricky part, which is the amount of cooking. If you don’t cook the vegetables enough, they will ferment in the jar, too much cooking and you have a mush. It is a bit trial and error I am afraid. Start to check how cooked the salad is and add lemon juice and salt and pepper to taste. 

As soon as the salad is cooked turn off the heat. Drain the jars from the water and fill with the salad while the jars are still hot. Asbestos fingers are a help here. The salad wants to come to about half a centimetre from the top of the jar. Make sure that the rim of the jar is clean, so that you have a good tight seal, before putting on the hot lids. Put  the lids on loosely for a minute or two and then tighten up. 

Leave to cool totally before washing the jars and labelling. I always check that the jars are well sealed at this point. If the lids have a nipple in the middle you should have heard this ping as the jars were cooling and it should be concave and pulled in. If there is no nipple the lids should still be slightly concave and tight looking. If they are not then use these jars straight away.

Variations preserved_courgette_salad

Courgette Salad – I made this after returning from a short trip to find that my courgettes had turned into mini-marrows while I was away. Courgettes, peeled and diced, onion chopped small, garlic as above and a couple of peeled and chopped tomatoes. Follow the master recipe above for the method.

Red Pepper Salad – Strips of red peppers slowly stewed in olive oil to just cover and seasoned with salt and lemon juice. Don’t worry about the amount of oil, when you come to use the salad drain off the oil and use it for cooking or salad dressings later.

preserved_artichoke_saladArtichoke Salad – As you clean and prepare the artichokes put them into water to which a good proportion of lemon juice has been added so that they do not discolour. Drain and stew in olive oil to cover. Season with salt – the lemon is already added.

Share this:

  • Share on X (Opens in new window) X
  • Share on Facebook (Opens in new window) Facebook
  • Share on WhatsApp (Opens in new window) WhatsApp
  • Email a link to a friend (Opens in new window) Email
Like Loading...

Fish Cous Cous and Chard with Pine Nuts and Golden Raisins

18 Wednesday Apr 2012

Posted by Nevenka in Main Courses, Vegetable Dishes

≈ Leave a comment

I have bought from my favourite stall in the local market a gorgeous chunk of skate. It has obviously come from a very large fish and looks really meaty – meaty enough to make me think of pairing it with some spices. The current best seller in my farm shop is Salt and Sweet Preserved Limes flavoured with fenugreek, mustard and star anise. It will be perfect to flavour the fish. The natural next step in the thought process is to think of the salted lemons of Morocco, and then to think of the cous cous that such dishes are usually served with. Although it is not mentioned in the recipe and is entirely optional, I threw in a handful of samphire.

FISH COUS COUS WITH SALT & SWEET LIMES

Cous cous – medium ground

Olive oil

1 clove garlic or a stick of spring garlic

120 gms fish per person – a meaty white fish such as swordfish or shark.

1 salt and sweet preserved lime per person

Fresh coriander and parsley – finely chopped

Firstly put the kettle on to boil.

Weigh out the cous cous – 25 gms per person if you are exercising portion control – 50 gms per person if they are very hungry – or somewhere between the two for a normal appetite.

Put the cous cous into a plastic container into which it fits without being shallow. If I am making cous cous just for myself, I have a small beaker that I use. If I am making for four or more people I have a plastic rice cooker for the microwave that does the job. Pour in enough boiling water to cover the cous cous by about a centimeter. Cover and leave to swell for 15 to 20 minutes.

Heat a shallow pan and add some olive oil. When hot add the garlic, stir and cook until slightly browned.

Cut the fish into chunks. Add to the pan and cover. Cook a few minutes. Stir and then leave to cook a couple more minutes.

Chop up the lime, in big chunks if you like a strong blast of lime or smaller if you want the flavour to be more amalgamated. Add to the fish. Cook a minute for the flavours to blend. Be careful that the fish is not overcooked. It is difficult to be precise as every variety of fish cooks differently.

Add the cous cous and the herbs. Again cook a minute to blend the flavours.

Serve with Harissa on the side and Acelgas con Pasas y Pinones………

Chard, or Acelgas in spanish, is grown in this part of spain in place of spinach. It suits much better the soil and the climate here. For the home grower it has the advantage of cropping over a very long period, in fact the plants that I am trimming for this recipe were planted a year ago. This recipe is incredibly simple, but the sum of the flavours is greater than the parts.

ACELGAS CON PASAS Y PINONES – Swiss chard with pine nuts and raisins

In a heavy based shallow pan toast the pine nuts over a low heat, shaking from time to time to turn until they are an even golden brown. Empty them onto a plate until later.

Wash the chard thoroughly. Discard the tough white stems. Finely chop the green leaves.

Once the pine nuts have been removed from their pan, add some olive oil to the pan back on a low heat. Add the chard, cover and leave to wilt for a couple of minutes.

Stir, season with salt, add the raisins. Cover and cook a couple more minutes. Add the pine nuts, stir again and cook again for another two minutes.

Turn off the heat and leave to slowly finish cooking in the residual heat for a further five minutes.

Share this:

  • Share on X (Opens in new window) X
  • Share on Facebook (Opens in new window) Facebook
  • Share on WhatsApp (Opens in new window) WhatsApp
  • Email a link to a friend (Opens in new window) Email
Like Loading...
Newer posts →

Blog at WordPress.com.

Privacy & Cookies: This site uses cookies. By continuing to use this website, you agree to their use.
To find out more, including how to control cookies, see here: Cookie Policy
  • Subscribe Subscribed
    • fincafood
    • Join 103 other subscribers
    • Already have a WordPress.com account? Log in now.
    • fincafood
    • Subscribe Subscribed
    • Sign up
    • Log in
    • Report this content
    • View site in Reader
    • Manage subscriptions
    • Collapse this bar
 

Loading Comments...
 

    %d